Difficulty: ★☆☆☆☆
Note: The below procedure will not erase your device securely! It will help you do this easily without much chance for you making a human error instead… 
The below procedure will wipe your disk so a normal user cannot see any data without forensic tools. If you want to securely erase a disk, so even the CIA, NSA, ФСБ, 国安部 cannot read it, consult your device manufacturer’s documentation.
-
Ensure the device is not connected to your computer, so put it in your pocket, on the shelf behind you, between your teeth, …

-
Reboot just to ensure that any trace of the device has disappeared from your system. (I never said it was going to be fast, just that it would be easy)

-
Go to the partition manager for your desktop:
-
partitionmanagerfor KDE -
gpartedfor Gnome - Any of the 2 above for XFCE as it doesn’t have its own
-
-
Enter the password if needed
-
For
partitionmanager: (click on the ▸ to expand)Details
- The list of disk devices permanently connected to your computer shows up at the left side of the window:
(In my case: 3 devices) - Familiarise yourself with their names as a new device will be added in the next steps!
- Now insert the device you want to erase (take it from in between your teeth, from your pocket or from the shelf behind you)
- If your environment asks you to do anything with the device: don’t, just go to the step below.
- Hit F5 on your keyboard OR go to menu item Tools and click Refresh Devices F5
- The device will now show up as an additional device below or in-between your existing devices (and why you should have familiarised yourself with the permanent devices in a previous step)

- Right-click the new device, choose New Partition Table and skip to step 7.
- The list of disk devices permanently connected to your computer shows up at the left side of the window:
-
For
gparted: (click on the ▸ to expand)Details
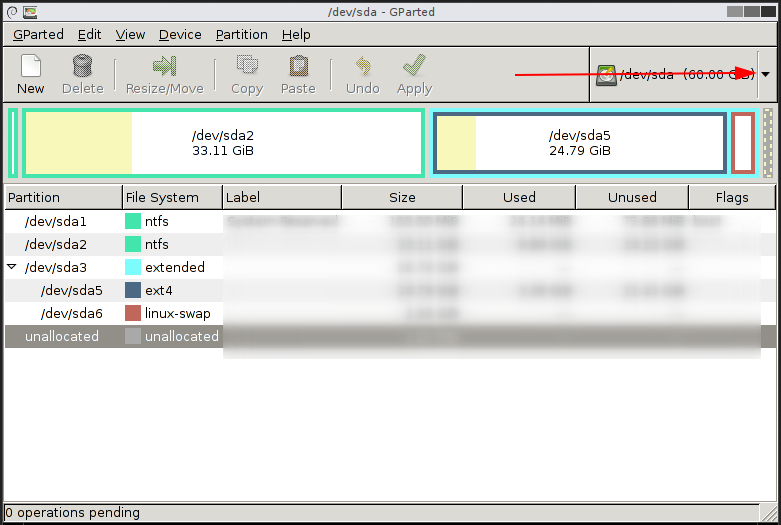
- Open the drop-down menu at the upper right corner of the window as per below screenshot:
- Familiarise yourself with the names of the devices that show up there as a new device will be added in the next steps!
- Now insert the device you want to erase (take it from in between your teeth, from your pocket or from the shelf behind you)
- If your environment asks you to do anything with the device: don’t!, just go to the step below.
- Hit F5 on your keyboard OR go to menu item GParted and click Refresh Devices
- The device will now show up as an additional device below or in-between your existing devices in the same menu (and why you should have familiarised yourself with the permanent devices in a previous step)
- Click on the new device.
- Click on the Device menu and choose Create Partition Table
- Open the drop-down menu at the upper right corner of the window as per below screenshot:
-
Nowadays there are just two kinds of partition table you might need:
- If you need compatibility with appliances like a TV, Camera, or that fruity company that we cannot mention or they’ll sue us, take
MSDOS.
- If you only want compatibility between recent versions of Linux and Windows (8-10), take
GPT.
- If you need compatibility with appliances like a TV, Camera, or that fruity company that we cannot mention or they’ll sue us, take
-
Verify again you’re working on the correct device!
(No! Really! Verify again! You’re going to destroy all data on there!) -
Click the Apply button (to the left on KDE, to the right on Gnome) and verify again when your partition manager asks you to.
-
Go to the Partition menu and choose New
-
If you need compatibility with:
- appliances like a TV, Camera, or that fruity company, take:
-
FAT32for devices created less than 10 years ago. -
FAT16if between 10 and 20 years old -
FATif it was manufactured in the previous millennium.
-
- only Linux and Windows NT 4.0 → Windows 10 use
NTFS.
(Use the appliance section above for Windows 1.0, 286, 386, Win3.x, Win95, 98 and ME)
- appliances like a TV, Camera, or that fruity company, take:
-
Close your partition Manager
-
Safely remove the disk

Done!