How to setup QEMU/KVM with virt-manager
Shared Clipboard:
-
Linux: install
spice-vdagenton the guest machine:
# Arch
sudo pacman -S spice-vdagent
# Debian
sudo apt install spice-vdagent
# Fedora
sudo yum install spice-vdagent
- Windows: Install the spice-guest-tools on the guest machine.
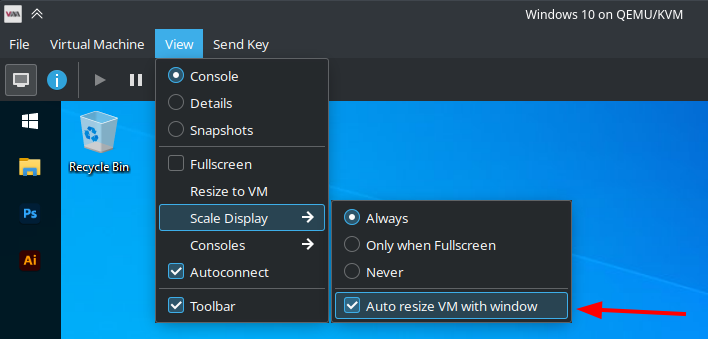
Auto resize VM resolution with window resize:
- First make sure that the
spice-guest-tools/spice-vdagentis installed on the host from the previous step. - And then navigate to View > Scale Display and check the “Auto resize VM with window” option:
A NOTE FOR LINUX GUESTS RUNNING XFCE
On Linux guests running XFCE, it does not work automatically, you have to run the following command every time you resize the window:
xrandr --output Virtual-1 --auto
Read more here.
You can add a launcher to the XFCE panel that executes this command.
But even better than that, I wrote the following quick and dirty script and added it to autostart, it makes it behave like the Windows VM:
#!/bin/bash
while true; do
    while read -r output; do
        xrandr --output $output --auto
    done < <(xrandr | grep "Virtual" | awk '{print $1;}')
    sleep 1
done
Another way that may be suggested is crontab, but crontab can’t run a command at less than 1 minute intervals. You can use watch by running the following command:
watch -n 1 xrandr --output Virtual-1 --auto
But I found it difficult to background the process, so I just stuck with my script, especially since it takes up hardly any extra resources.
Shared Folders:
On your host machine (Manjaro/Linux):
-
Create a folder to share with.
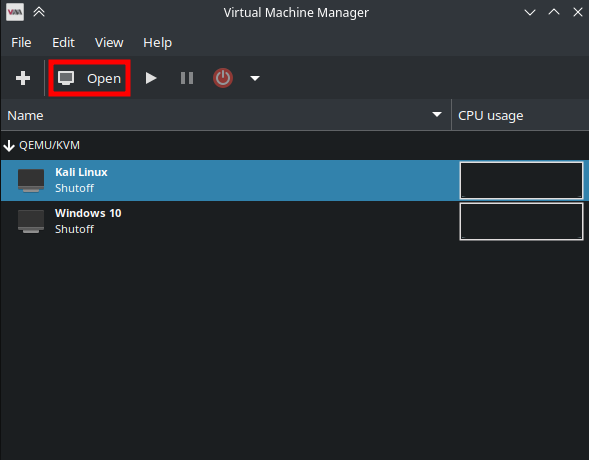
-
Open virt-manger, select the virtual machine you want to share a folder with and click open:
-
Click on the info tab, and then click on add hardware:
-
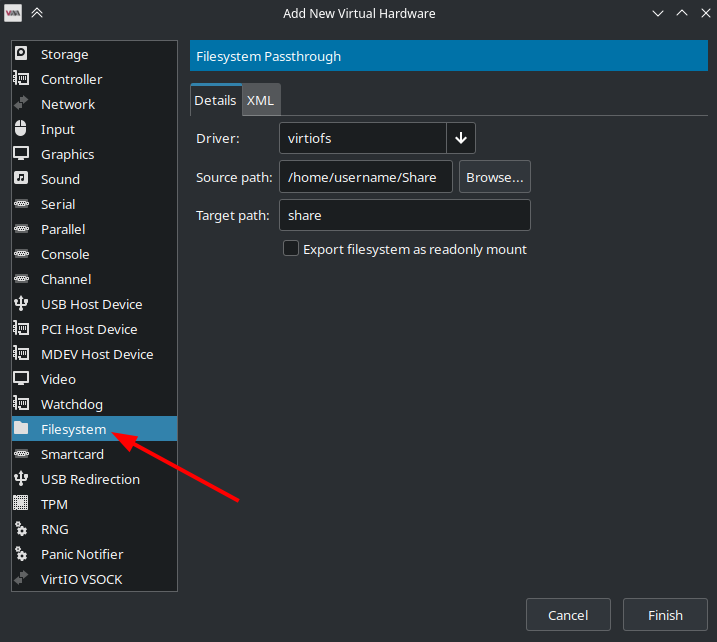
Select filesystem, and fill in the fields.
-
Driver: Keep this as
virtiofs - Source Path: This is the path to the folder you want to share on your host.
-
Target path: Now this is misleading. It’s not a path, rather it’s the name the share will be given on the guest machine.
-
Driver: Keep this as
-
After you have filled the fields, click on the finish button.
This is all you have to do on your host.

On the guest:
- Linux:
- Create a folder to have the share mapped to.
- Open the terminal in the guest machine, and type:
sudo mount -t virtiofs sharename path/on/guest
- To make it permanent add the following entry to the
/etc/fstab:
sharename path/on/guest virtiofs defaults 0 0
- That’s it! Good old Linux!!
- Windows:
I know, I know, this is the Manjaro Linux forum. However, most people use virtual machines to run Windows so I thought I should add this to the guide, especially since it’s not that straight forward.
-
Install the
virtio-winpackage from the AUR on your Host (yay -S virtio-win).-
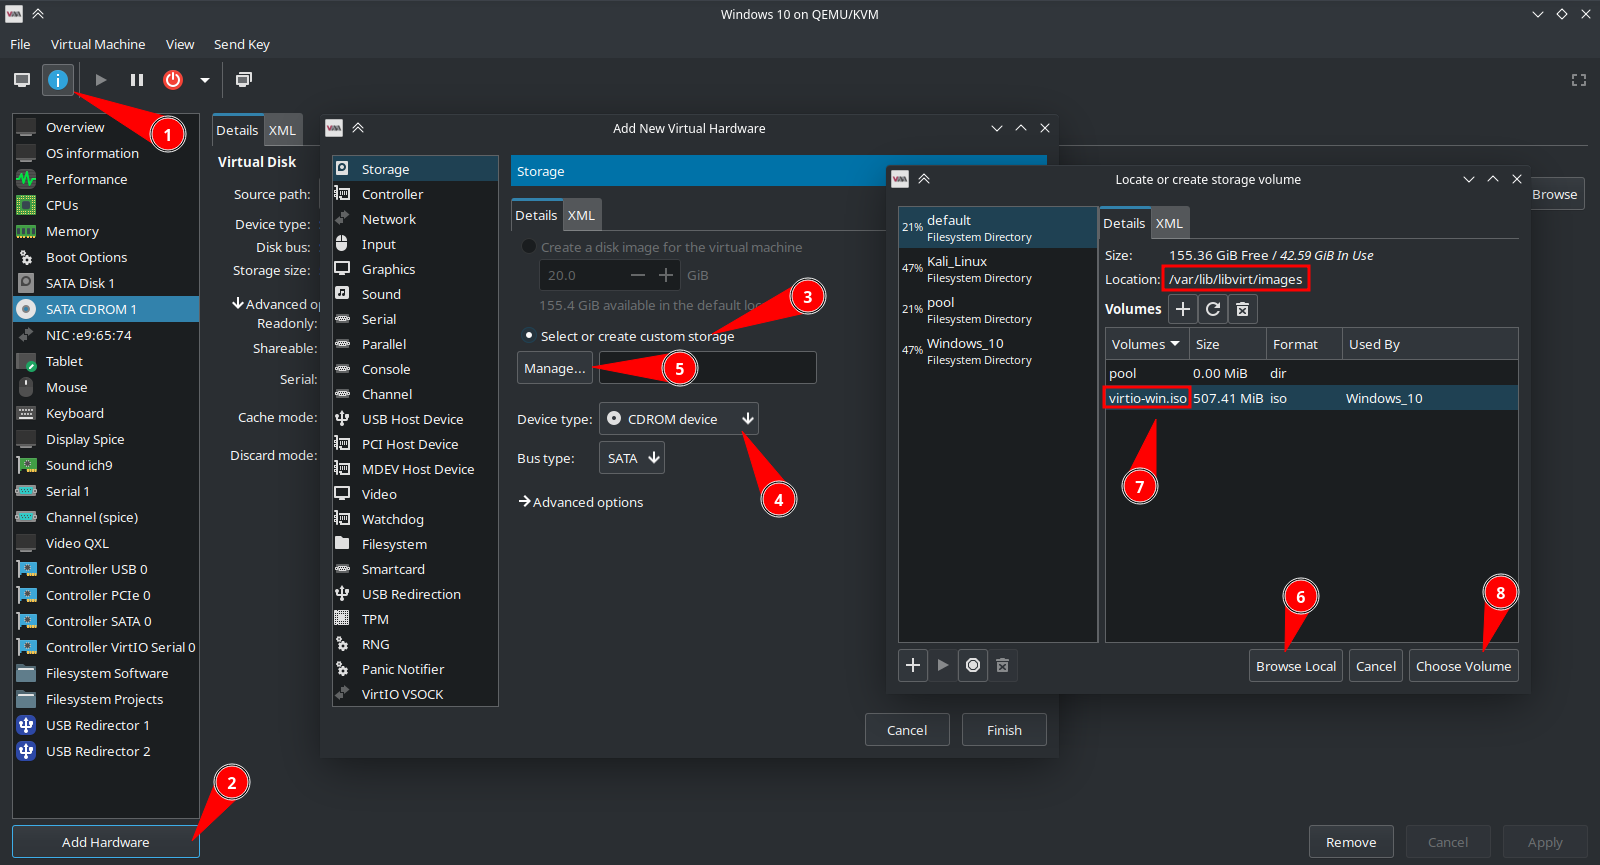
Navigate to the info tab again and click on “Add Hardware”
-
Select the storage option, click on “Select or create custom storage”,
-
Change “Device type:” and then click on “Manage”.
-
Click on “Browse Local” and select
/var/lib/ibvirt/images/virtio-win.iso -
Select “virtio-win.iso” and click on “Choose Volume”.
Good oldflameshot
-
Or, if you prefer the manual way, download the virtio driver on the Windows machine and mount it there.
-
-
Download WinFSP and install it (on the guest).
-
Open the device manager:
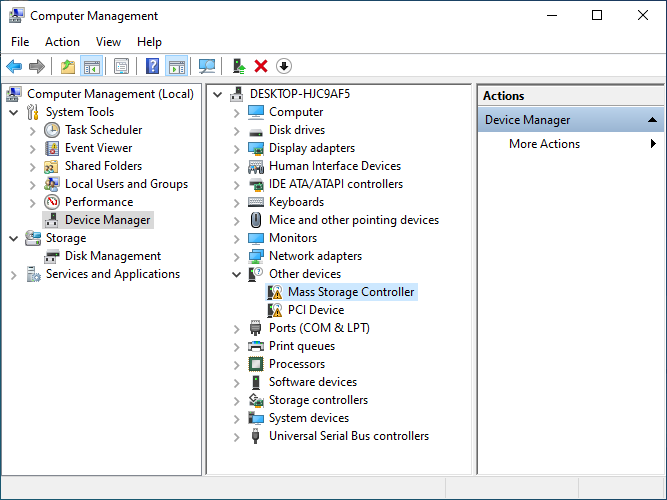
Image credit goes to this blog. -
Right click on the “Mass Storage Controller” and select “Update driver”, Choose “Browse my computer for drivers” and select the mounted ISO.
-
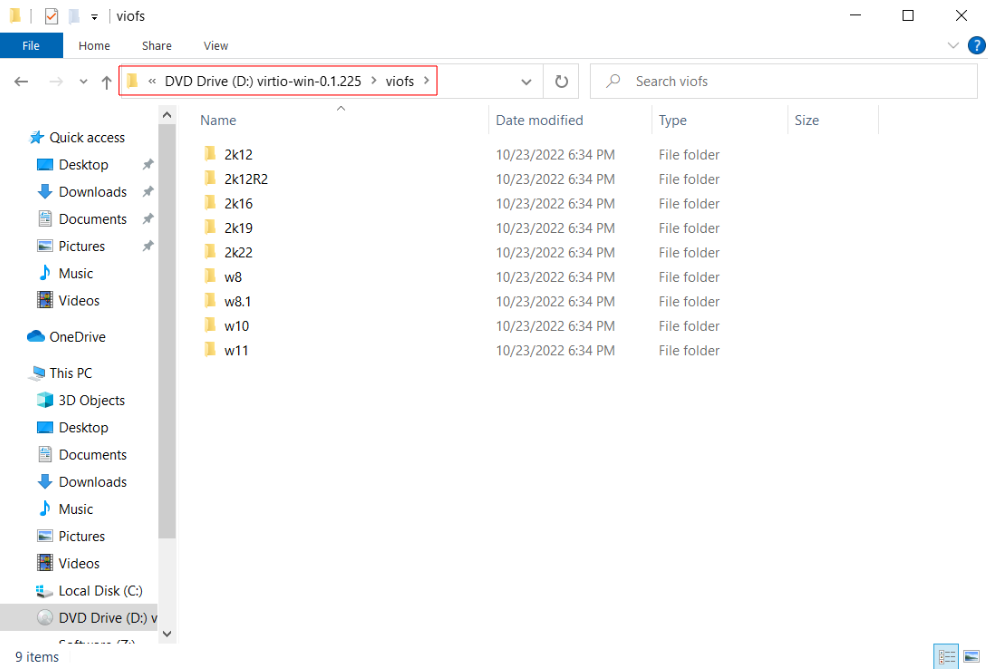
After the drivers are installed, navigate to the viofs folder in the mounted ISO and copy the correct folder according to your Windows version (“w10” for Windows 10):
-
Copy it to a location on the C: drive such as
C:\virtiofs\w10. -
Open a command line and type:
sc.exe create VirtioFsSvc binpath="path\to\virtiofs.exe" DisplayName="Virtio FS Service"
sc.exe start VirtioFsSvc
- Now the shared folders should show up as mounted drives in the file explorer.
NOTE: An issue that I can’t seem to solve is that only the first share is shown, i.e if I create more than one share, only the first defined one shows up.