Simple Manjaro NAS
This is a short guide showing how you can add NAS filesharing capabilities to a running Manjaro installation thus adding simple NAS functionality.
prepare your system
The first step is mandatory - to ensure the system is fully up-to-date
sudo pacman -Syu
This little project will use the web-based cockpit administration application. This application is maintained by Red Hat developers - so all documentation inside the app is pointing to Red Hat documentation.
Cockpit is a modular web application allowing the administrator to add various plugins or applications. A lot of plugins exist - they are user contributions - so it is recommended to properly assess your requirements and the plugin, before you pour it onto your production system.
add firewall protection
To fend off unwanted traffic - you should consider adding the firewalld to your system - cockpit has an excellent applet for maintaining firewalld (only the default zone is managed).
sudo pacman -S firewalld
Then enable and activate the firewalld
sudo systemctl enable --now firewalld
Be aware that upon starting the firewall, you immediately block everything except the default rules: dhcpv6-client and ssh. To access the system using cockpit and allowing the filesharing you must add cockpit and samba to the firewall.
First enable the rules
sudo firewall-cmd --add-service={samba,cockpit} --permanent
Then activate the rules
sudo firewall-cmd --add-service={samba,cockpit}
cockpit
Should you want to explore some Arch Linux based documentation - see this entry point into the Arch Linux wiki → Cockpit - ArchWiki
Installing cockpit is simple
sudo pacman -Syu cockpit
Then enable the web service
sudo systemctl enable --now cockpit.socket
Also enable avahi services for better discovery of your shares in your local network.
sudo systemctl enable --now avahi-daemon.socket avahi-daemon.service avahi-dnsconfd.service
The webservice is running on port 9090 - so open a browser and point the address to

Before we continue - login and explore the basic features - where a web based terminal is an important part. Other parts are
- Logs
- Networking and firewall (assuming Network Manager)
- Accounts
- Services
cockpit files
cockpit-files is a file manager plugion to have a basic remote file management solution
sudo pacman -S cockpit-files
cockpit storage
cockpit-storaged is a device manager, adding physical storage management to the webapp.
sudo pacman -S cockpit-storaged
cockpit file-sharing
A word of warning and caution: Public writable shares are at risk of unautorized changes by ransomware so it is important to secure your shares with username and password.
Adding the File Sharing component makes it easy to configure and maintain SMB and NFS shares for your local network.
The plugin source is on Github and a PKGBUILD is found with AUR
→ GitHub - 45Drives/cockpit-file-sharing: A Cockpit plugin to easily manage samba and NFS file sharing.
→ AUR (en) - cockpit-file-sharing
Building is straight forward - you can do it in the cockpit terminal - we use pamac - but you can use your preferred AUR helper
pamac build cockpit-file-sharing
Before you can start the service - you need to create an empty /etc/smb.conf.

This can be achieve in the Terminal, execute the command
sudo touch /etc/samba/smb.conf
Then navigate to the Services section in cockpit and while on the Services tab, use the filter box, locate smb, click the link and enable the service.
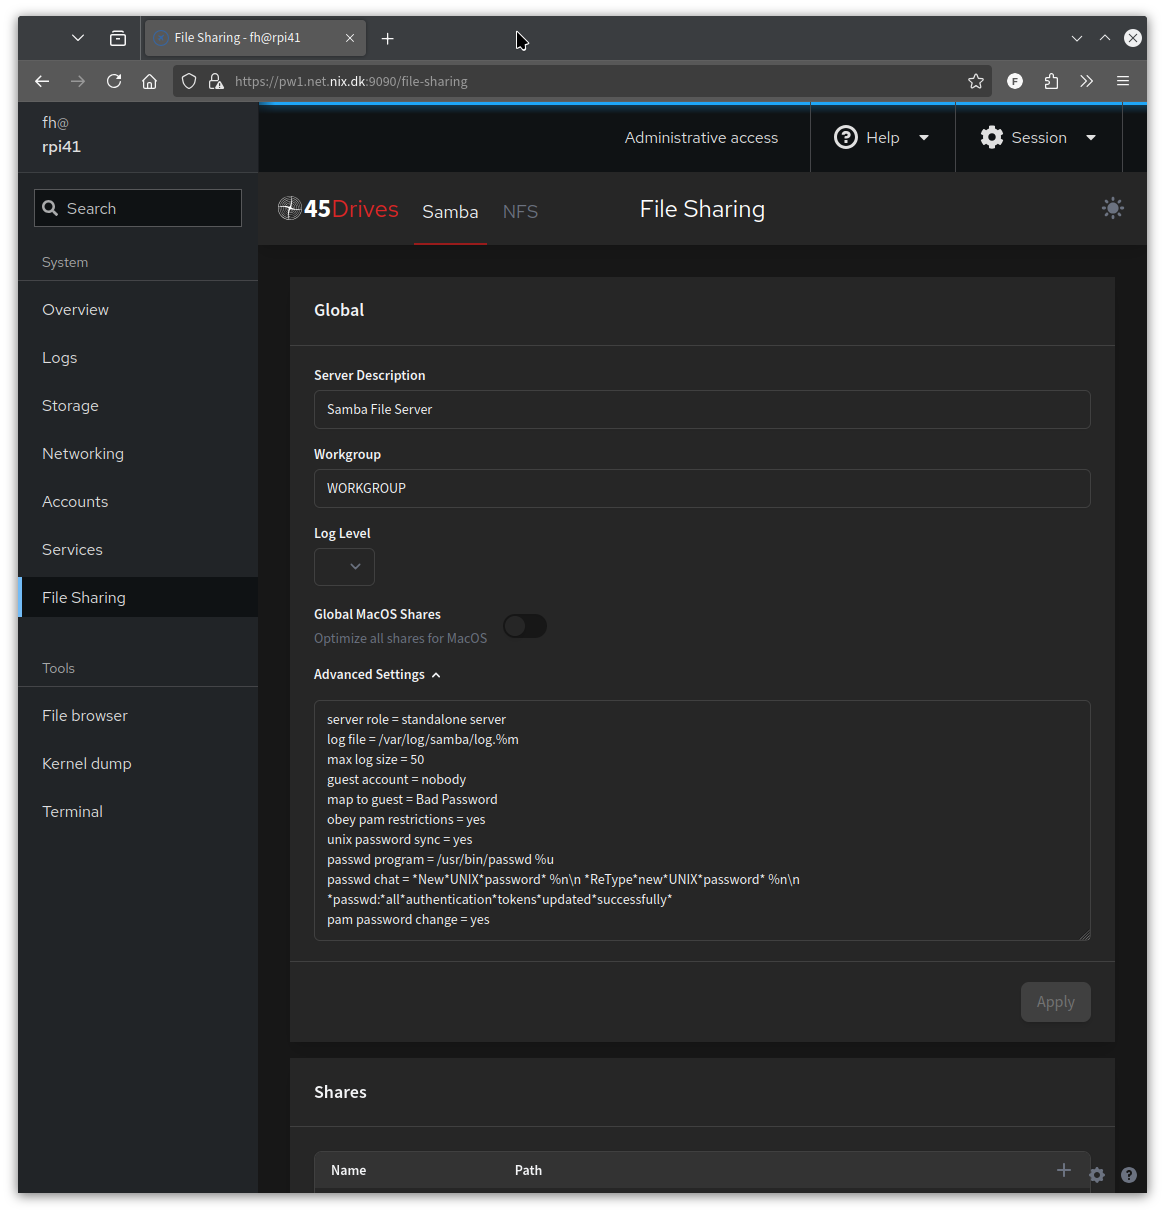
configure samba
Start in the Accounts section and create a group called smbusers
Select your account and add it to the newly created group.

configure file-sharing

Click File Sharing in the left pane.
At the top you have two options Samba and NFS.
First fill in the Global section. See [root tip] [How To] Samba Server From Scratch for more configuration.
Define a new share by clicking the + sign in the Shares section
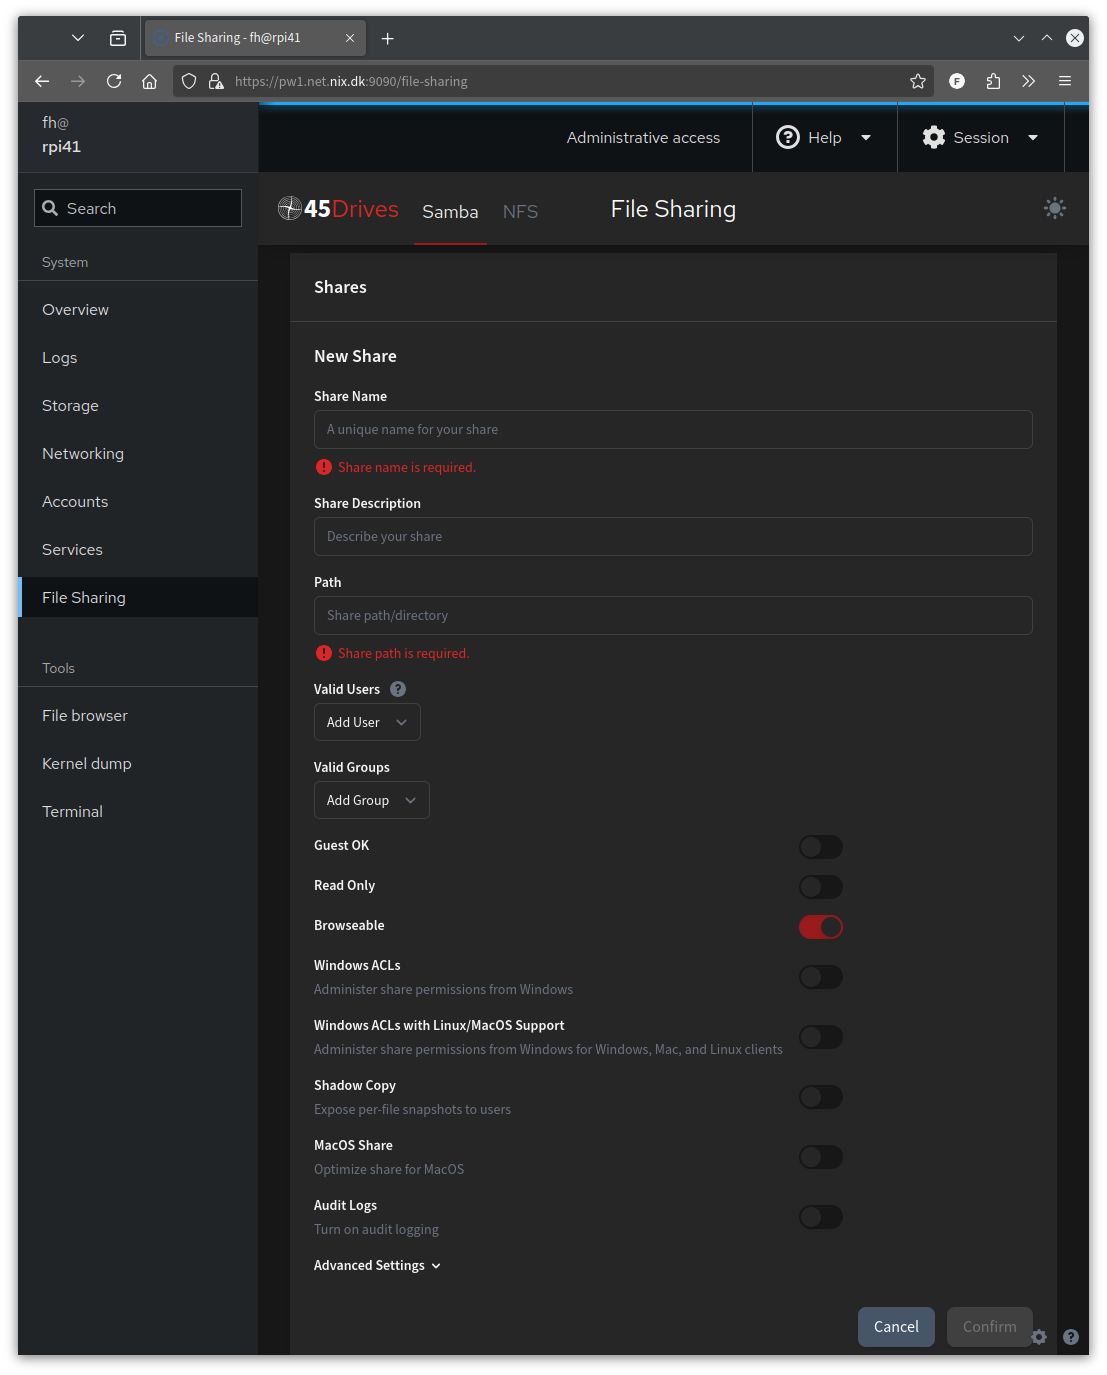
The Share Name and Path are mandatory - and the path must exist, if it does not the input will show a link named Create now.
If the path is valid - you see a link underneath labellel Edit Permissions - and this is for ensuring the correct permission has been set for the physical share path.
When all is set - click Confirm button
Normally when you reconfigure your samba service or shares - you should ensure to restart the service otherwise the changes will not take effect - but using the cockpit applet will switch the configuration from being file-based (/etc/samba/smb.conf to be database based - thus the changes should immediately reflect on the service.