Difficulty: ★★☆☆☆
This tutorial will provide tips on getting the most from your Digital Audio Converter (DAC) alongside Manjaro.
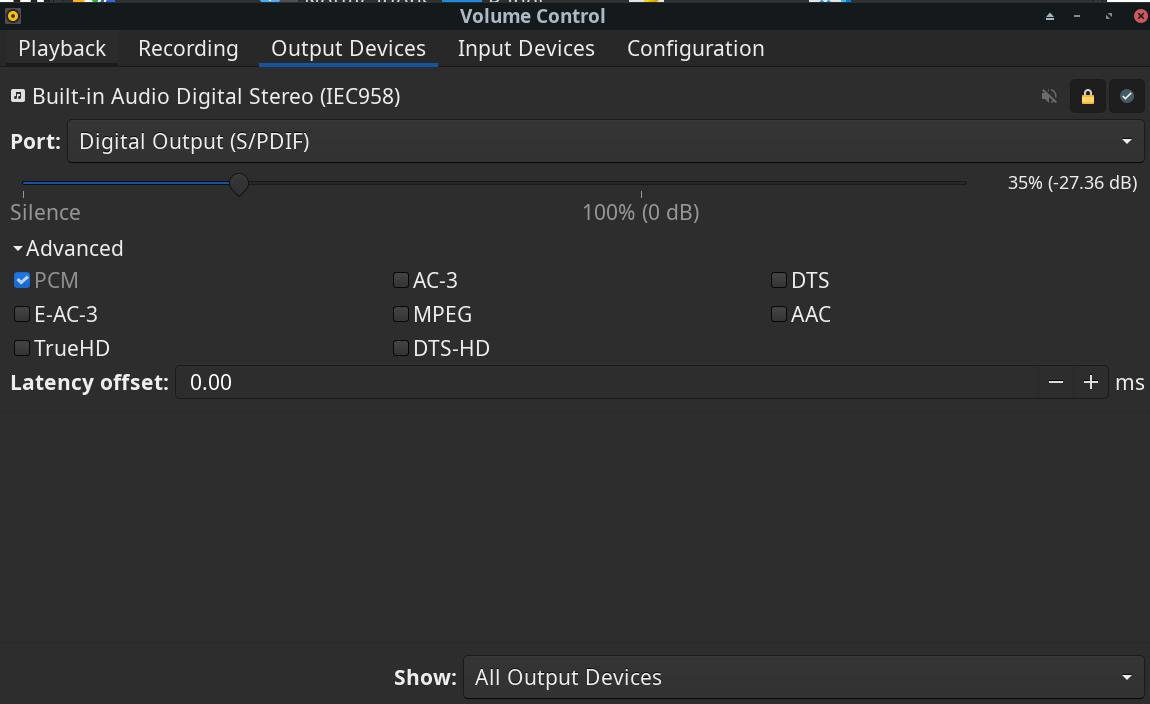
This was tested on a Cambridge Audio Stream Magic but would apply equally to any of the Cambridge Audio DAC range.
About DACs
Other DACs
If you find this post helpful and you are using a DAC from a different manufacturer please post comments below.
Resampling
From an audiophile perspective resampling is considered to be a bad thing before we get to the DAC. This tutorial will show how to minimise this.
USB Class
Cambridge Audio DACs support Class 1 and Class 2 USB. Both work with Manjaro but Class 2 is not as stable and seems to lock up when switching audio output. While Class 2 is required to obtain 192kHz sample rates, Class 1 mode will allow sample rates up to 96kHz and a 24bit bit rate which is often good enough. After testing both modes the author of this tutorial opted to use Class 1 mode.
The documentation for your DAC will explain how to switch classes. If it does not then chances are it only supports Class 1 anyway.
Gather Information
Before proceeding, review your DAC’s documentation to obtain your optimum configuration. You need to discover the following:
- Maximum supported bit rate (16 bit or 24 bit usually)
- Maximum supported sample rate (44.1kHz, 48kHz, 96kHz or 192kHz usually)
Once you’ve reviewed the caveats below, note which Target Bit Rate and Target Sample Rate you want to achieve.
Quality Limit Caveats
For compatibility, if your maximum supported bit rate exceeds 24 bit, choosing 24 bit as your target for the purpose of this tutorial is recommended.
This tutorial recommends limiting your sample rate to 96kHz unless you have a specific need for 192kHz as this is only supported via USB Class 2 which seems to be less stable.
Branching
This tutorial now goes one of two ways, depending on whether your core audio package is based on PulseAudio or PipeWire. You can check this by looking at the Software Centre and looking to see whether you have manjaro-pipewire or manjaro-pulse installed (You can’t have both). If you have a specific custom setup you may have neither but in that case you should know which you are using.
Caveats before you start (PulseAudio vs PipeWire)
Having been through this now with both PulseAudio and PipeWire, I have found PipeWire to be much easier to work with for this purpose and with cleaner results so I would recommend investigating whether switching to PipeWire first will work for you. For me it was easy, I just installed the manjaro-pipewire package and everything just worked (I took a full timeshift backup first though - just in case!).
I did this as something in PulseAudio seemed to break recently with my DAC and make audio intermittent and inconsistent.
PulseAudio
To enable Hi-Res audio do the following:
Create a user config for PulseAudio if you do not already have one
Setting for all users
You can skip this step and make changes directly to the files in /etc/pulse which then apply to all users. As getting this wrong can break PulseAudio configuring it in user config as this tutorial describes is recommended and then, when it’s all working, daemon.conf can be copied back to /etc/pulse to apply globally. ![]()
Check to see if you have this directory: ~/.config/pulse and if not type…
mkdir `~/.config/pulse`
Otherwise type…
cp -r ~/.config/pulse ~/.config/pulse.old
Then…
cp /etc/pulse/client.conf ~/config/pulse
cp /etc/pulse/daemon.conf ~/config/pulse
Edit daemon.conf to set the desired settings
Using your editor of choice open daemon.conf for editing…
nano ~/.config/pulse/daemon.conf
Standard File Contents
; daemonize = no
; fail = yes
; allow-module-loading = yes
; allow-exit = yes
; use-pid-file = yes
; system-instance = no
; local-server-type = user
; enable-shm = yes
; enable-memfd = yes
; shm-size-bytes = 0 # setting this 0 will use the system-default, usually 64 MiB
; lock-memory = no
; cpu-limit = no
; high-priority = yes
; nice-level = -11
; realtime-scheduling = yes
; realtime-priority = 5
; exit-idle-time = 20
; scache-idle-time = 20
; dl-search-path = (depends on architecture)
; load-default-script-file = yes
; default-script-file = /etc/pulse/default.pa
; log-target = auto
; log-level = notice
; log-meta = no
; log-time = no
; log-backtrace = 0
; resample-method = speex-float-1
; avoid-resampling = false
; enable-remixing = yes
; remixing-use-all-sink-channels = yes
; remixing-produce-lfe = no
; remixing-consume-lfe = no
; lfe-crossover-freq = 0
; flat-volumes = no
; rescue-streams = yes
; rlimit-fsize = -1
; rlimit-data = -1
; rlimit-stack = -1
; rlimit-core = -1
; rlimit-as = -1
; rlimit-rss = -1
; rlimit-nproc = -1
; rlimit-nofile = 256
; rlimit-memlock = -1
; rlimit-locks = -1
; rlimit-sigpending = -1
; rlimit-msgqueue = -1
; rlimit-nice = 31
; rlimit-rtprio = 9
; rlimit-rttime = 200000
; default-sample-format = s16le
; default-sample-rate = 44100
; alternate-sample-rate = 48000
; default-sample-channels = 2
; default-channel-map = front-left,front-right
; default-fragments = 4
; default-fragment-size-msec = 25
; enable-deferred-volume = yes
; deferred-volume-safety-margin-usec = 8000
; deferred-volume-extra-delay-usec = 0
These lines are all disabled using a ; marker. Update the following sections of the file. Keeping the commented out defaults is recommended for future reference and is very helpful if something doesn’t work.
resample-method = speex-float-10
; resample-method = speex-float-1
avoid-resampling = yes
; avoid-resampling = false
resample-method - The resample method is well documented in the PulseAudio documentation. This may need some experimentation for your DAC. For a Cambridge Audio DAC the highest quality type is supported so it is set here.
avoid-resampling - This is a gotcha as the two valid entries seem to be false and yes - Setting it to true resulted in a PulseAudio config that would not start. Setting this to yes will cause your DAC to output the appropriate sample rate for whatever audio is playing provided it is capable.
default-sample-format = s24le
; default-sample-format = s16le
default-sample-rate = 96000
; default-sample-rate = 44100
alternate-sample-rate = 44100
; alternate-sample-rate = 48000
default-sample-format - This sets the bit rate, set this according to the value you noted earlier for Target Bit Rate. There are several variants here, again covered by the PulseAudio documentation. For the test case the le variant was correct. The number should be changed to match the bit rate. The example above sets a default bit rate of 24 bit audio.
default-sample-rate - This sets the sample rate noted earlier for Target Sample Rate and just the number part is entered. Do not enter any decimal points or kHz here else PulseAudio will not start. The example above sets a default sample rate of 96 kHz.
A Note on Default Bit & Sample Rates
The values you set here will be the defaults that the PC will output to the DAC when it either has an audio source which will not be supported directly or when multiple audio sources are mixing together. When playing a single music file the bit rate and sample rate of that piece of music will take priority, whether higher or lower.
Restart PulseAudio
To get everything working you then need to either restart your machine or restart PulseAudio, like this…
pulseaudio --kill
pulseaudio --start
Troubleshooting
If, on trying to restart, PulseAudio fails to start then you can revert to your original configuration by removing daemon.conf and client.conf from ~/.config/pulse. Start again from scratch but apply each change to the daemon.conf file one line at a time, restarting PulseAudio and testing as you go.
PipeWire
Most of these instructions are taken from the Arch Linux wiki docs on PipeWire. This was a lot easier than with PulseAudio. You can look at them directly here: PipeWire - ArchWiki.
Create configuration files
By default the config files are in /usr/share/pipewire - The intetion is that you copy them either for system wide or local application - For the purpose of this tutorial and to maintain parity with the PulseAudio instructions above, I will assume a local configuration setup. If you prefer system wide just look at the config files in /usr/share/pipewire for guidance.
cp -r /usr/share/pipewire ~/.config/pipewire
Setting sample rates
Use your favourite editor to edit pipewire.conf…
nano ~/.config/pipewire/pipewire.conf
Remove the # indicators, which are commenting out the lines to set default.clock.rate and default.clock.allowed-rates. These two parameters are used to set the default sample rate and available sample rates respectively. In my case the end result of this section of the file looks like this…
## Properties for the DSP configuration.
default.clock.rate          = 96000
default.clock.allowed-rates = [ 44100 48000 88200 96000 ]
#default.clock.quantum       = 1024
default.clock.min-quantum   = 16
#default.clock.max-quantum   = 2048
#default.clock.quantum-limit = 8192
#default.video.width         = 640
#default.video.height        = 480
#default.video.rate.num      = 25
#default.video.rate.denom    = 1
Ideally, you want to set default.clock.rate to the main sample rate you want to use for mixed audio. If you set all allowed rates then PipeWire should automatically choose the appropriate supported sample rate for the audio source.
Setting resampling parameters
Sometimes resampling will still happen. If you have a nice expensive DAC then you want to optimise the quality in this. You do this by changing the resample.quality parameter in 2 files - client.conf and pipewire-pulse.conf, in the stream.properties section. The end result should look like this…
stream.properties = {
    #node.latency          = 1024/48000
    #node.autoconnect      = true
    resample.quality      = 10
    #channelmix.normalize  = false
    #channelmix.mix-lfe    = false
    #channelmix.upmix      = true
    #channelmix.upmix-method = psd  # none, simple
    #channelmix.lfe-cutoff = 150
    #channelmix.fc-cutoff  = 12000
    #channelmix.rear-delay = 12.0
    #channelmix.stereo-widen = 0.0
    #channelmix.hilbert-taps = 0
}
This defaults to 4 and the Arch Wiki docs suggest you can potentially push it to 15 but I’ve gone with 10 as a safe starting point.
Log Out (or Reboot)
At this point you need to restart PipeWire. You can’t do this while signed in, so you may as well log off and log back in again or go for a full reboot (if you’ve made changes system wide via configuration in /etc/pipewire rather than local user as above).