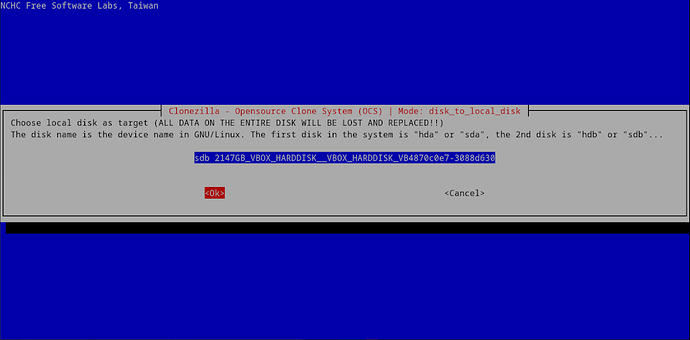
Note 1: To avoid the possibility of overwriting the wrong disk, remove all disks apart from the source and destination devices. It’s presumed the new larger disk is properly connected, configured in BIOS, and detected by the system.
Note 2: This procedure is not recommended if multibooting any other OS.
Clone an existing Manjaro disk to a larger disk
1. Boot with a Manjaro Live DVD/ISO/USB.
2. Open Terminal and start CloneZilla:
sudo clonezilla
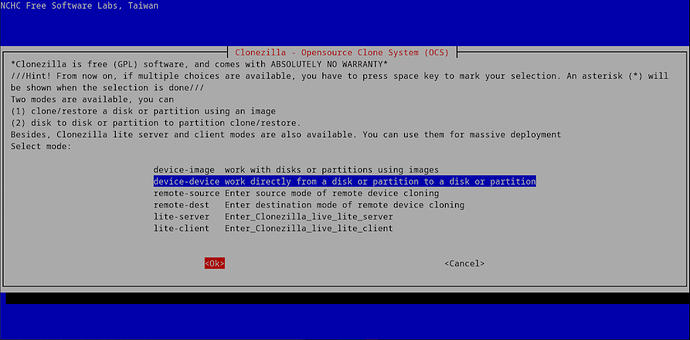
Choose cloning method (device-device)
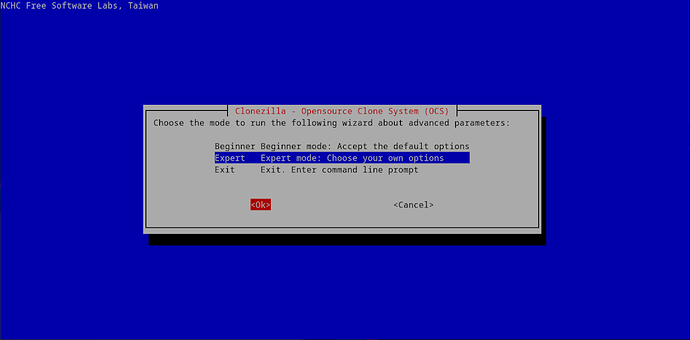
Choose skill level (Beginner/Advanced)
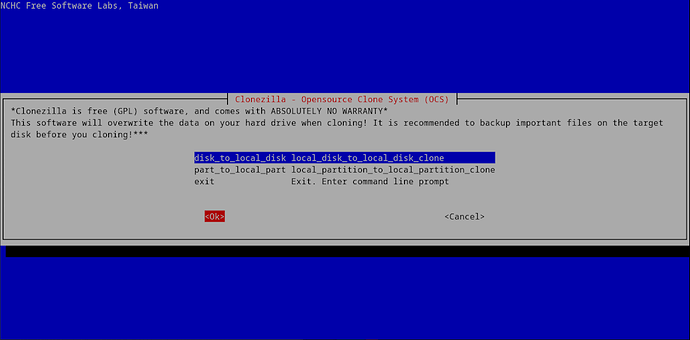
Choose clone type (local_disk-local_disk)
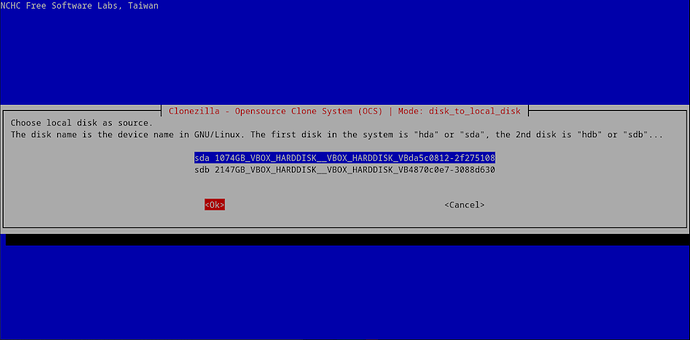
Local disk source
Local disk destination
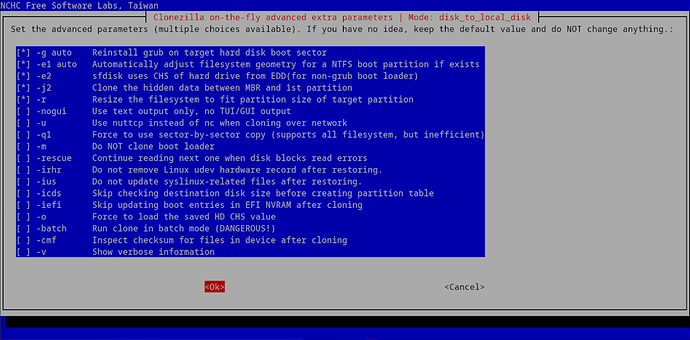
Advanced extra parameters (as shown)
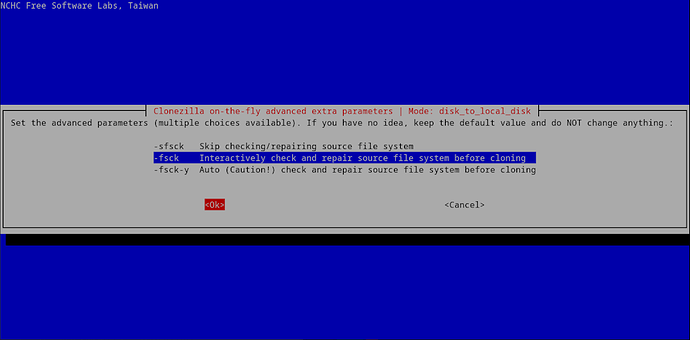
Check source before cloning (-fsck)
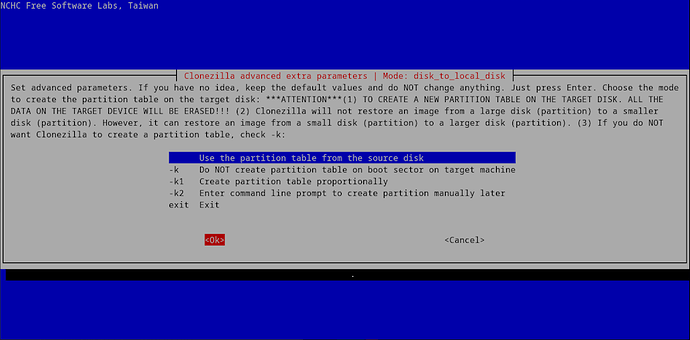
Use partition table from source disk (as shown)
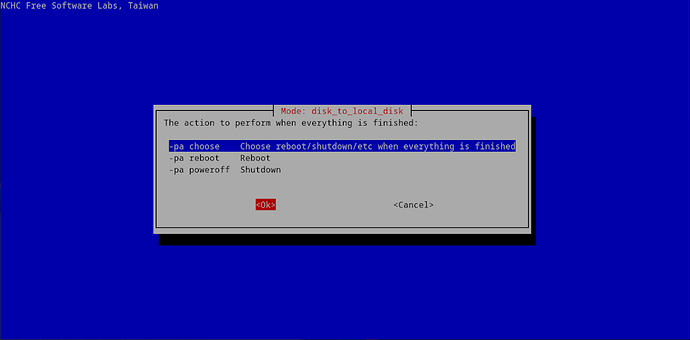
Action to perform when finished (-pa choose)
Confirmations
Press "Enter" to continue...
Are you sure you want to continue? (y/n)
Are you sure you want to continue? (y/n)
3. Exit Terminal and shutdown the computer.
- Disconnect power from the computer:
- Physically disconnect the old disk.
4. Boot to the Manjaro Installer DVD/ISO/USB; Open GParted (GUI):
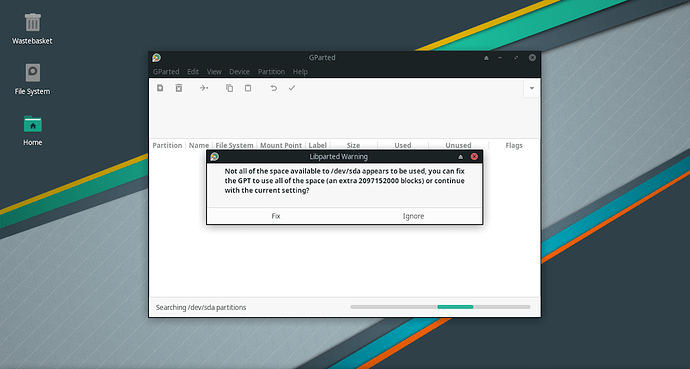
When launching GParted you will notice a Libparted Warning
- The warning is expected.
- Choose Fix to use all of the available space (Important).
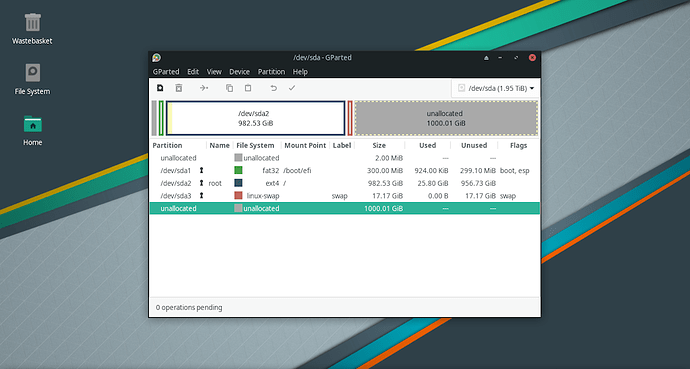
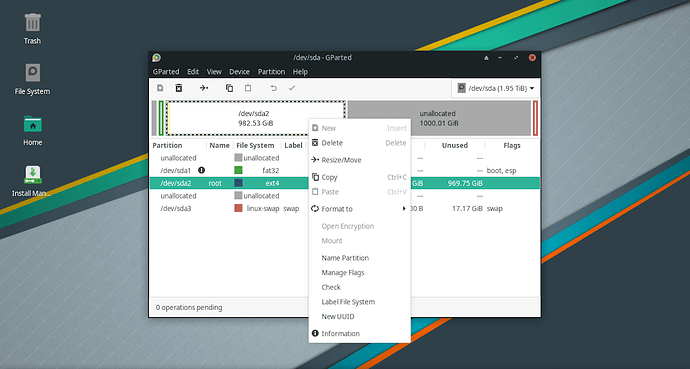
5. With GParted open you will notice the unallocated space.
In these next steps we will perform partition resizing operations:
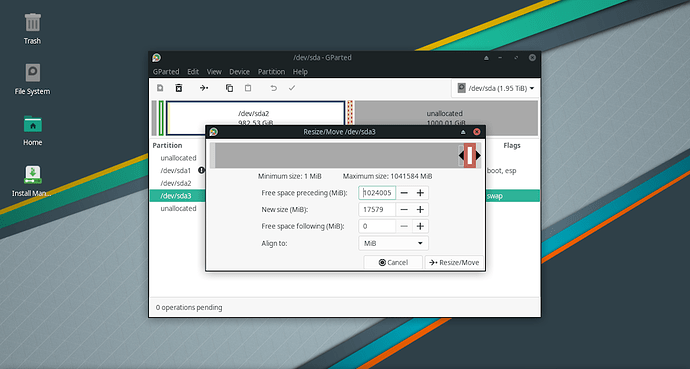
Right-click the swap space and choose Resize/Move
Drag the dedicated swap to the end of the disk
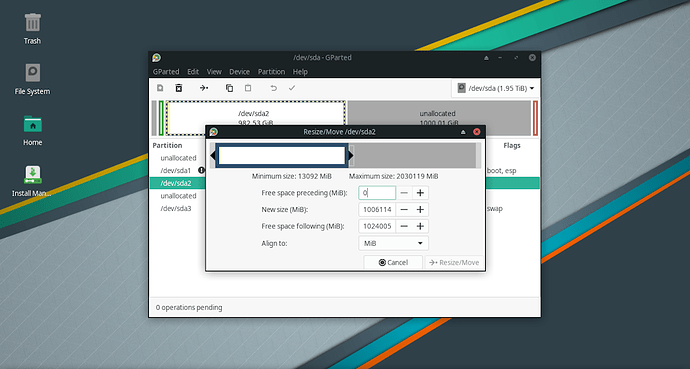
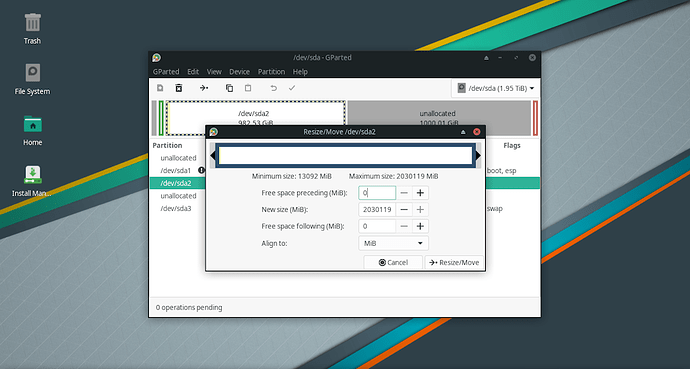
Right-click the root partition and choose Resize/Move
Drag the (right-hand) selection arrow to the end of the disk
Make sure to click the TICK to apply all operations.
6. Close GParted. Restart the computer.
7. When you are finally satisfied with the new cloned OS, you might wish to repurpose the old disk:
- Shutdown the computer; disconnect from power.
- Swap the disks so that only your old disk is connected.
- Boot with the Manjaro Live Installer DVD/ISO/USB.
- Use GParted to create a new GPT partition table on the old disk.
- At this point you can create new partitions and format them as desired.
- When finished, close GParted and shutdown the computer.
- Reconnect the new cloned OS disk, and make sure its first in boot order; boot to BIOS to check, if needed.
Enjoy your extra space!
4 Likes
You may want to select the “-k1” (and “-r”) option to automatically resize.
I stated that in the other topic, did you try it?
Works for me.
At the bottom:
https://clonezilla.org/clonezilla-live/doc/03_Disk_to_disk_clone/advanced/05-advanced-param.php
I have purposely left all settings as the defaults for simplicity, and to avoid complication.
However, it does look useful. Did you have success with that setting when cloning a disk or partition?
This guide is strictly for disk to disk cloning; though I may add an example of using partitions and disk images when I have some free time; whatever that is.
What does -k1 actually mean?
they don’t have a man page -
the --help option isn’t helpful
I think I saw that it means:
resize proportionally
500 MB on the source of 1TB would be translated to 1 GB on a 2 TB drive.
No real control on the size of the volumes.
Just proportions.
everything times two in this example case
Not many seem to understand the implications.
it seems that simply creating the partitions as one wants them and then copying the stuff over is just too easy … clonezilla has to get inserted into that very simple process 
Oh well … have fun!
