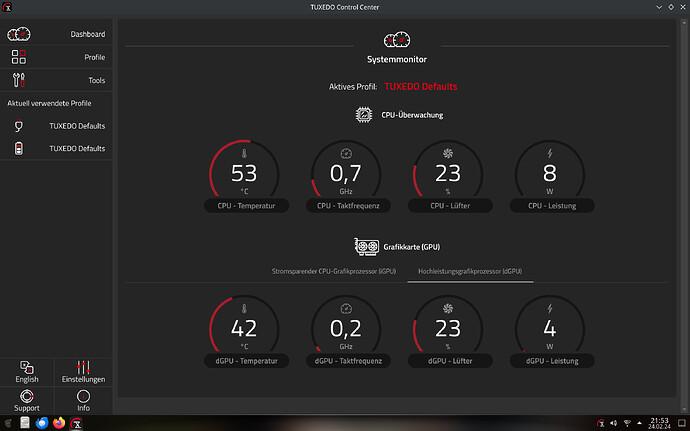
Tuxedo Laptop configurations
General configuration
Packages
To get a functional Tuxedo experience there is a couple of packages to install.
The cpu power profiles requires the driver package, which in turn requires kernel headers to be installed.
Kernel headers is in separate packages and you need to list which kernel is currently running
mhwd-kernel -li
If the current running kernel is e.g. linux66 select linux66-headers as the optional package or specify the headers on the command line, also include base-devel to be able to compile source.
sudo pacman -Syu tuxedo-control-center base-devel
Tuxedo InfinityBook Pro 14/16
- Touchpad switch work OOB with Linux kernel 6.6
- Keyboard backlight work OOB with Linux kernel 6.6
To have the touchpad indicator showing the disabled state, install tuxedo-touchpad-switch.
While touchpad switch works OOB with Plasma Wayland session, it ceases function after installing Tuxedo Control Center which depends on the tuxedo-drivers-dkms package.
Attempts to execute the utility from terminal on Wayland produce the following message
 $ tuxedo-touchpad-switch
setup_kde(...): Could not infd touchpad module in kded.
main(...): setup_kde(...) failed.
On X11 the function works as expected.
Kernel configuraton
Edit /etc/default/grub and add the following to the existing cmdline
GRUB_CMDLINE_LINUX_DEFAULT=" i915.enable_guc=2 "
Rebuild grub
grub-mkconfig -o /boot/grub/grub.cfg
mkinitcpio.conf
Append i915 to the modules array
MODULES=(i915)
Rebuild init
mkinitcpio -P
Restart your system
Additional info on Intel performance setup
https://wiki.archlinux.org/title/CPU_frequency_scaling#Intel_performance_and_energy_bias_hint
Firmware flash
The following packages must be synced to be able to create a stick for flashing the system.
- gptfdisk
- edk2-shell
sudo pacman -Syu gptfdisk edk2-shell
English
![]()
![]()
You may brick your device - only do this if you confident and know what you are doing.
The steps I followed are these - I apologize in advance for not posting in German - I will provide a translation below.
- Create a GPT partitioned stick with one partition formatted as FAT32.
TUXFLASH=/dev/sdy sgdisk --clear --new=1:0:0 --typecode=1:0700 --change-name=1:TUXEDOFLASH ${TUXFLASH} mkfs.vfat -F32 /dev/${TUXFLASH}1 - On the system where you create the disk install edk2-shell package.
- Create a folder on the stick
TUXMOUNT="/mnt" mount /dev/disk/by-label/TUXEDOFLASH $TUXMOUNT mkdir -p ${TUXMOUNT}/EFI/BOOT - Copy the full shell to the usb
cp /usr/share/edk2-shell/x64/Shell_Full.efi ${TUXMOUNT}/EFI/BOOT/BOOTx64.EFI - Copy all files from the firmware package and place them in ${TUXMOUNT}/EFI
With secure boot disabled reboot the system - press F7 to access the boot override menu. Also attach power supply - just in case …
Select the stick an boot.
When the shell has loaded enter (you will be using the US keymap so : will be the third key from the right - counting the second row left to the Enter key).
The process on my system is a two-part process with a reboot in-between
First the EC update
FS0:
cd EFI
Update_ME.nsh
Then the firmware update
FS0:
cd EFI
f.nsh
The firmware will likely be reset and you will be greeted with a boot policy violation after the firmware update.
German
Übersetzung von Vivaldi eingebautem Übersetzer
![]()
![]()
Sie können Ihr Gerät bemalen - tun Sie dies nur, wenn Sie zuversichtlich sind und wissen, was Sie tun.
Die Schritte, die ich unternommen habe, sind diese - ich entschuldige mich im Voraus dafür, dass ich nicht auf Deutsch gepostet habe - ich werde unten eine Übersetzung vorlegen.
-
Erstellen Sie einen partitionierten GPT-Stick mit einer als FAT32 formatierten Partition.
TUXFLASH=/dev/sdy sgdisk --clear --new=1:0:0 --typecode=1:0700 --change-name=1:TUXEDOFLASH ${TUXFLASH} sudo mkfs.vfat -F32 /dev/${TUXFLASH}1 -
Installieren Sie auf dem System, auf dem Sie das paket edk2-shell erstellen.
-
Erstellen Sie einen Ordner auf dem Stick
TUXMOUNT="/mnt" mount /dev/disk/by-label/TUXEDOFLASH $TUXMOUNT mkdir -p ${TUXMOUNT}/EFI/BOOT -
Kopieren Sie die vollständige Shell in den USB-Anschluss
cp /usr/share/edk2-shell/x64/Shell_Full.efi ${TUXMOUNT}/EFI/BOOT/BOOTx64.EFI -
Kopieren Sie alle Dateien aus dem Firmware-Paket und platzieren Sie sie in ${TUXMOUNT}/EFI
Wenn der sichere Start deaktiviert ist, starten Sie das System neu - drücken Sie F7, um auf das Boot-Override-Menü zuzugreifen. Schließen Sie auch die Stromversorgung an - nur für den Fall …
Wählen Sie den Stick einen Boot.
Wenn die Shell geladen wurde, geben Sie ein (Sie verwenden die US-Keymap, sodass : der dritte Schlüssel von rechts ist - und zählen Sie die zweite Zeile links bis zur Taste Enter).
Der Prozess auf meinem System ist ein zweiteiliger Prozess mit einem dazwischen liegenden Neustart
Zuerst das EC-Update
FS0:
cd EFI
Update_ME.nsh
Dann das Firmware-Update
FS0:
cd EFI
f.nsh
Die Firmware wird wahrscheinlich zurückgesetzt und Sie werden nach dem Firmware-Update mit einem Verstoß gegen die Bootrichtlinien begrüßt.
Wiki post - add your system
This topic is a wiki post - add you system by using the template below. ![]()
