I’m writing this due to the lack of any tutorials when trying to configure this myself.
Wanted to provide some easy to follow instructions for future reference & anyone else interested!
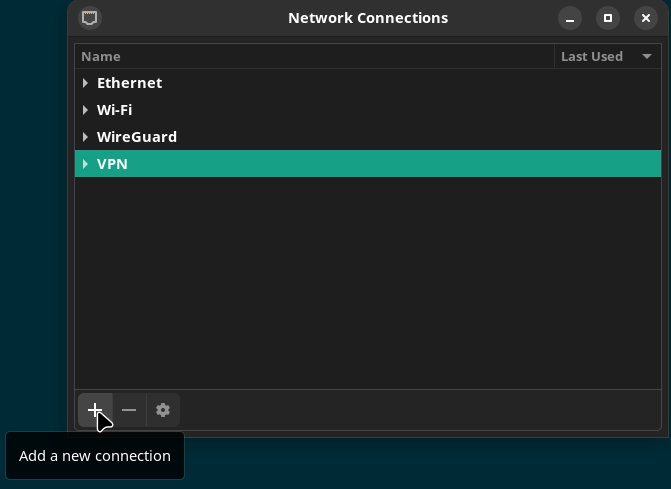
Install nm-connection-editor via your package manager.
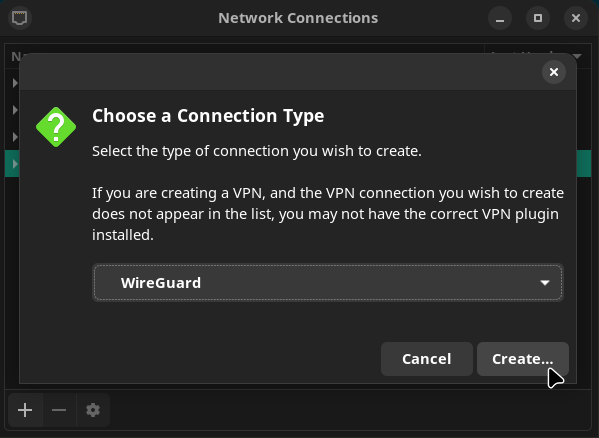
Open the Advanced Network Configuration GUI, add a new connection & select WireGuard
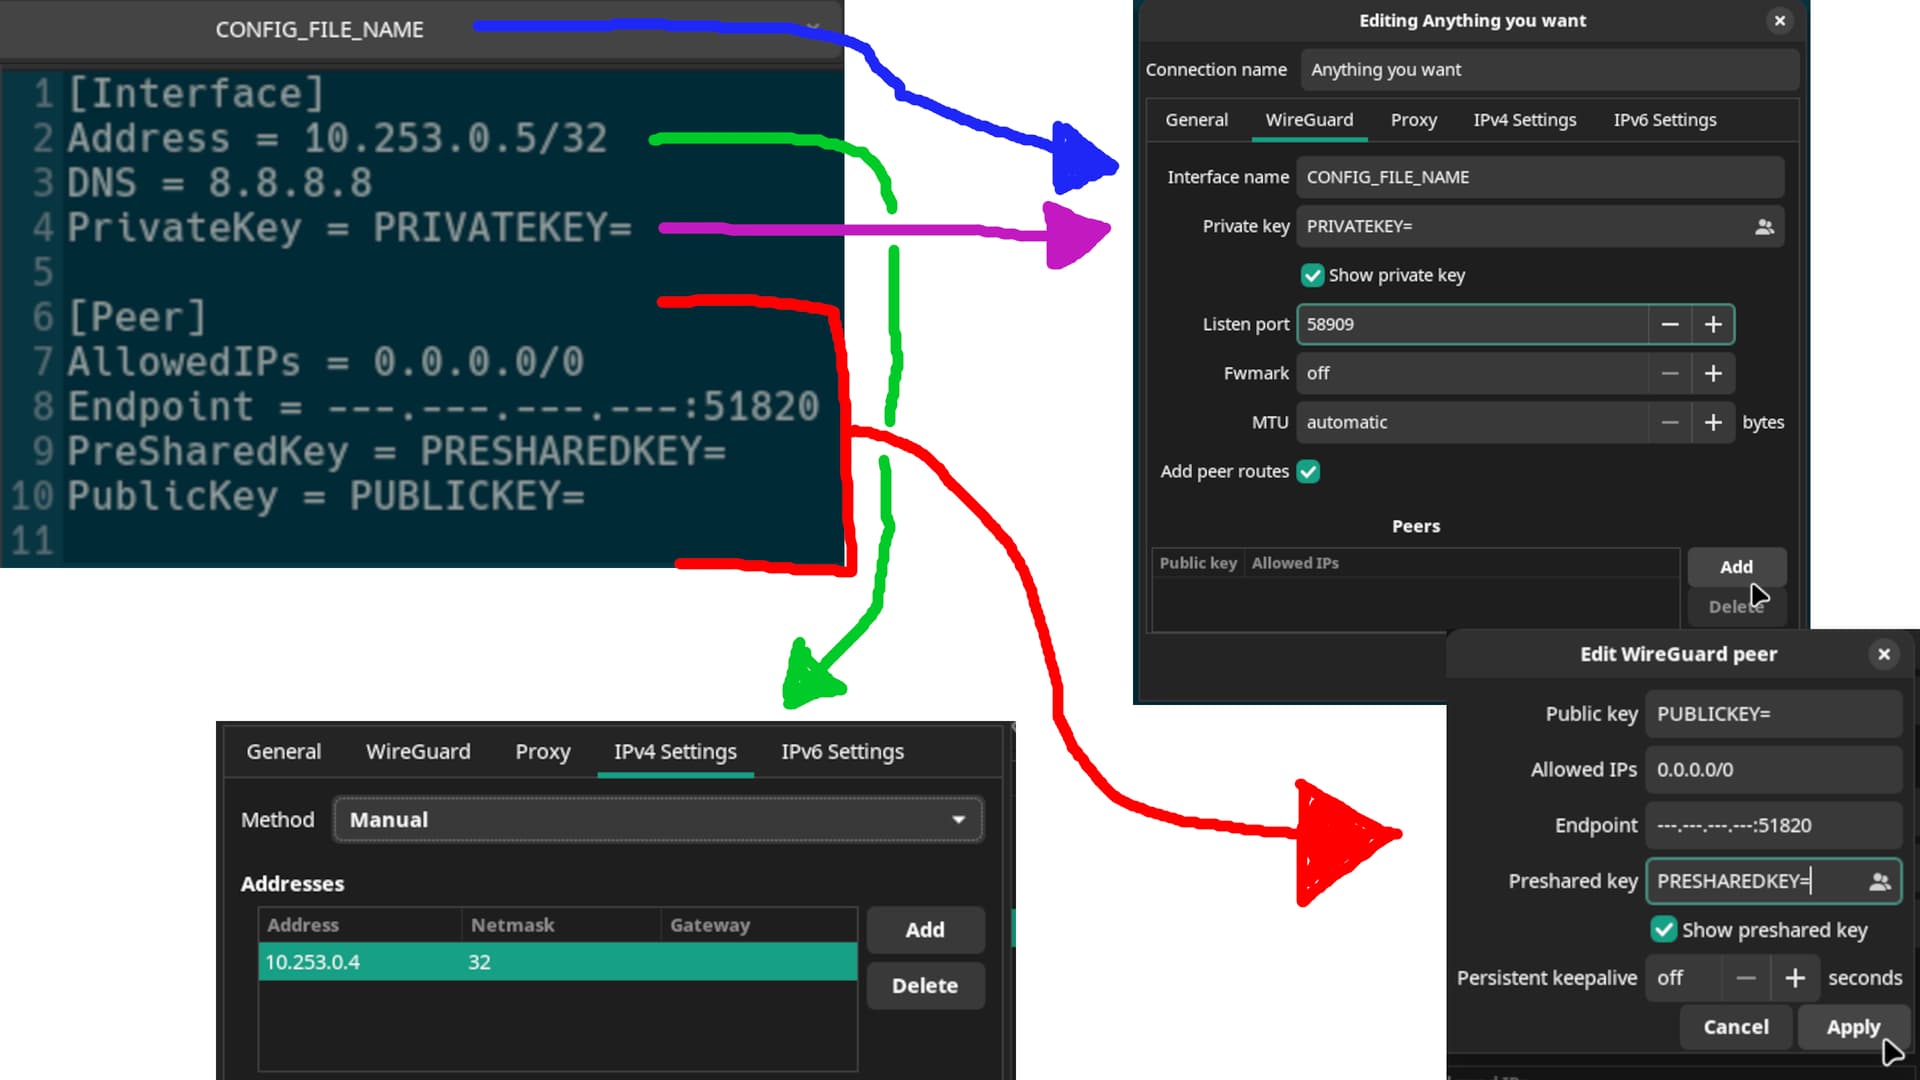
Use the following diagram to translate your WireGuard client config file to the Advanced Network Configuration GUI.
I was JUST trying to get this to work, and for the life of me I could not figure it out.
My problem was that I didn’t have the IPV4 settings correct. I kept thinking I needed to supply a gateway in the manual config. When I did that (using the VPN address as the gateway), I was required to use a netmask of 24 and nothing would work. By supplying 32 as the netmask and omitting the gateway, everything worked!
I know that “me too” and “thank you” posts are evil.
But… I was trying for hours to setup WireGuard on my Arch linux, graphically, with no luck.
The default Network manager configuration doesn’t let me accept the values.