(instructions in the tutorial thread to post here and link to the tutorial)
I tried following the above tutorial but the “iso in /opt” does not work. Besides, I want to do backups on the drive that my /opt and / and /root is mounted so its out of the question anyway.
Just using another directory on other drives does not work either ofc.
I could just use a usb stick but what is the fun in that? Besides, you can make damn sure that if I ever HAVE to restore, that usb stick will never be found. xD
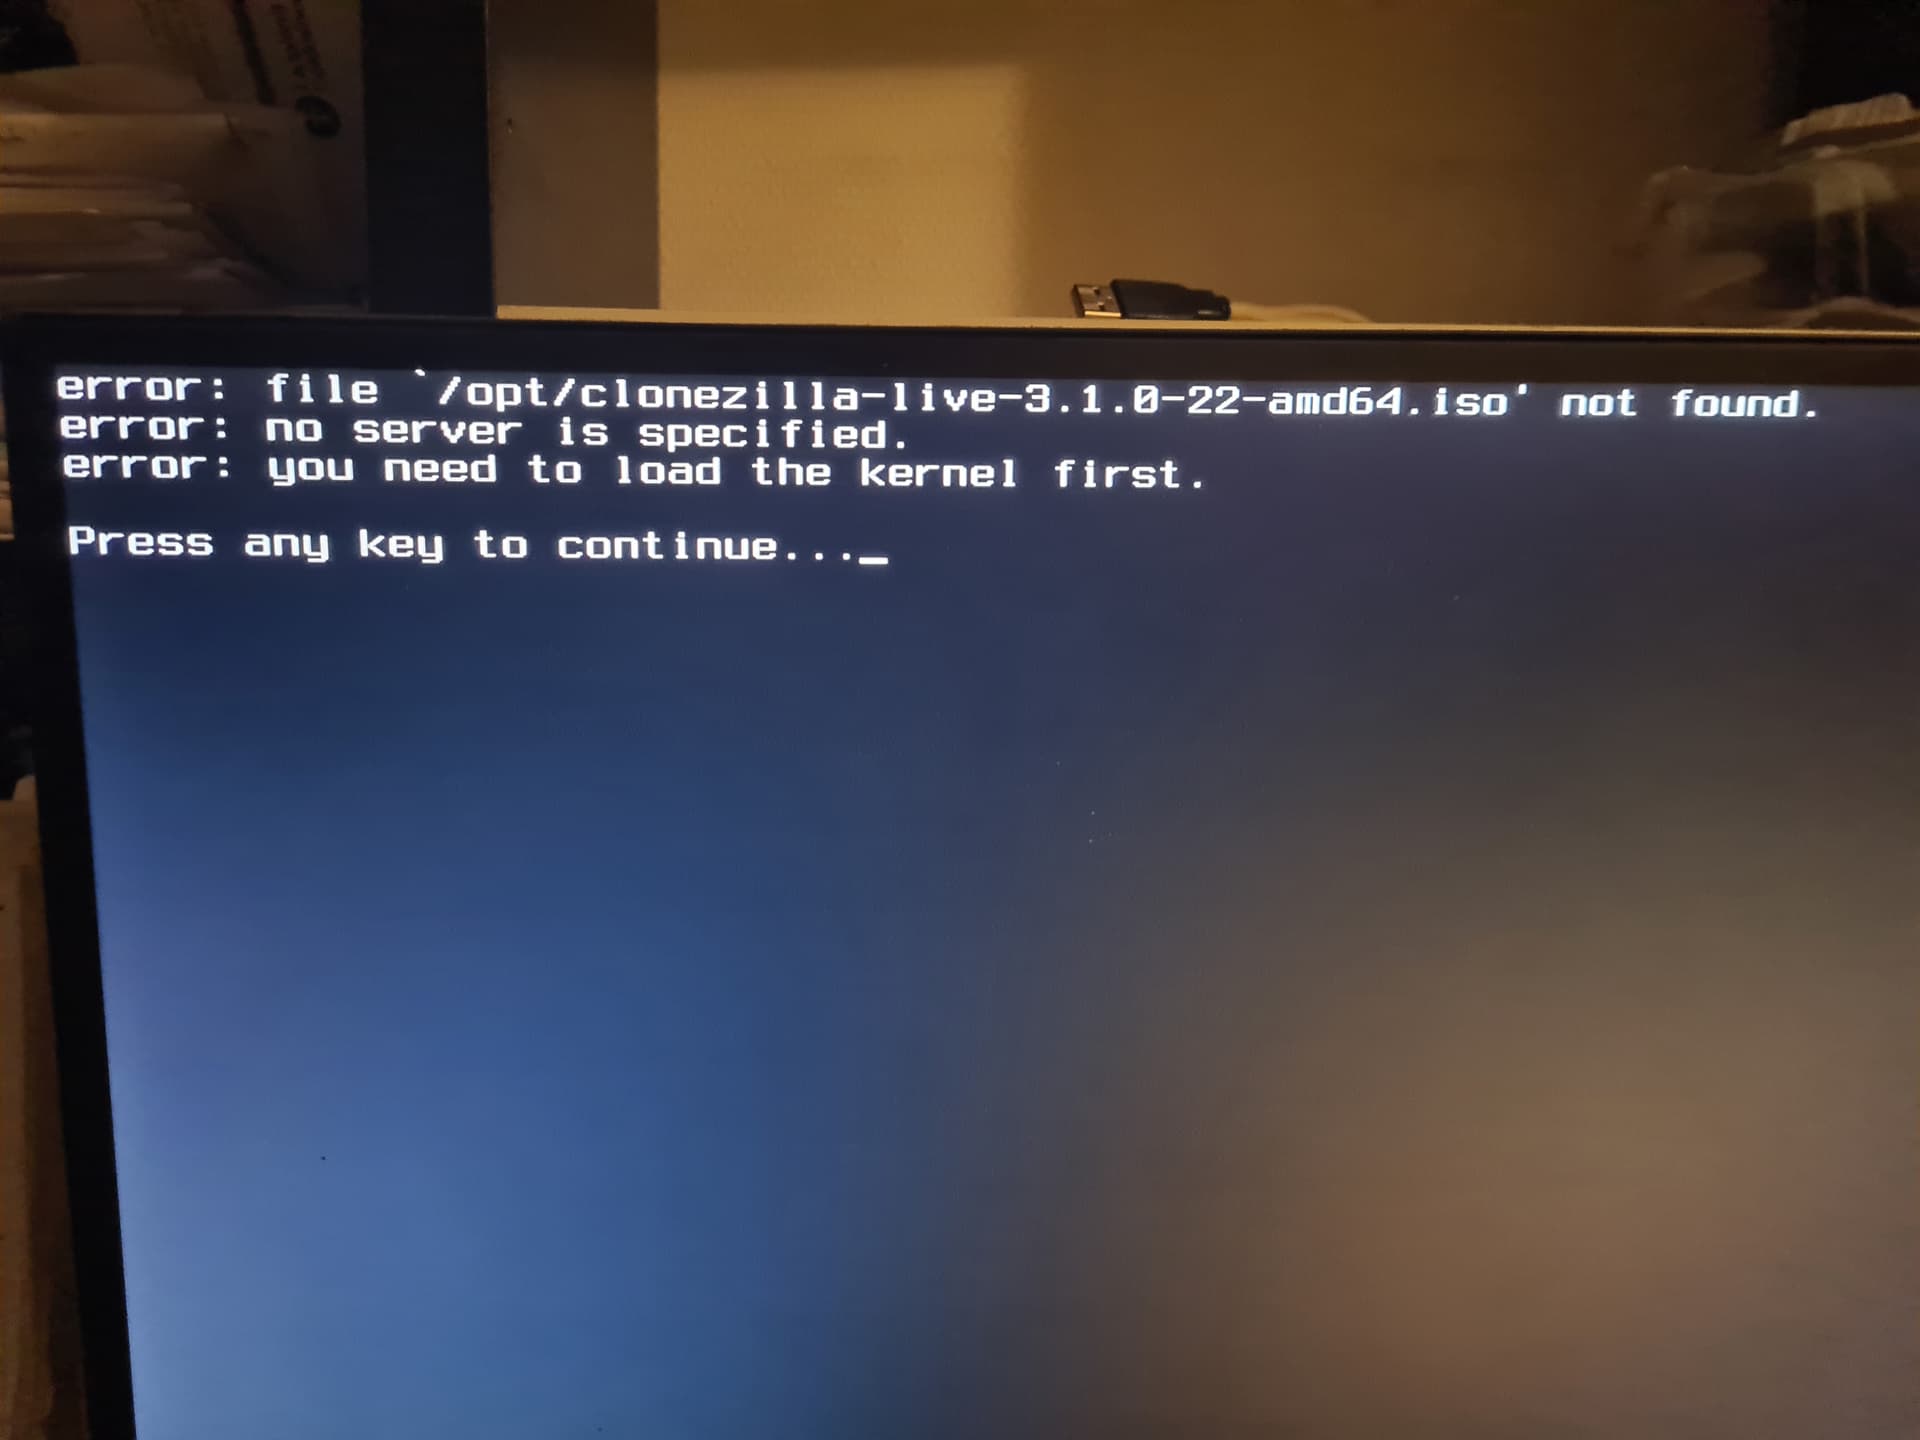
I looked the instructions on Clonezilla and using and modifying the method described there with a TON of trial and error I managed to load clonezilla from grub by using following line in /etc/grub.d/40_custom
The drive in question is a mechanical WD red formated in ntfs and the iso file is stored in / of that drive if that matters.
I now find “Clonezilla-live ISO” in the grub menu, I can run it, backup and restore both whole disk and separate partitions (yes, I have tried to restore, and it works)
I store my backups on a partition that is never mounted on my system except for when doing backups/restores as recommended in the tutorial (clever, I would not have thought about that).
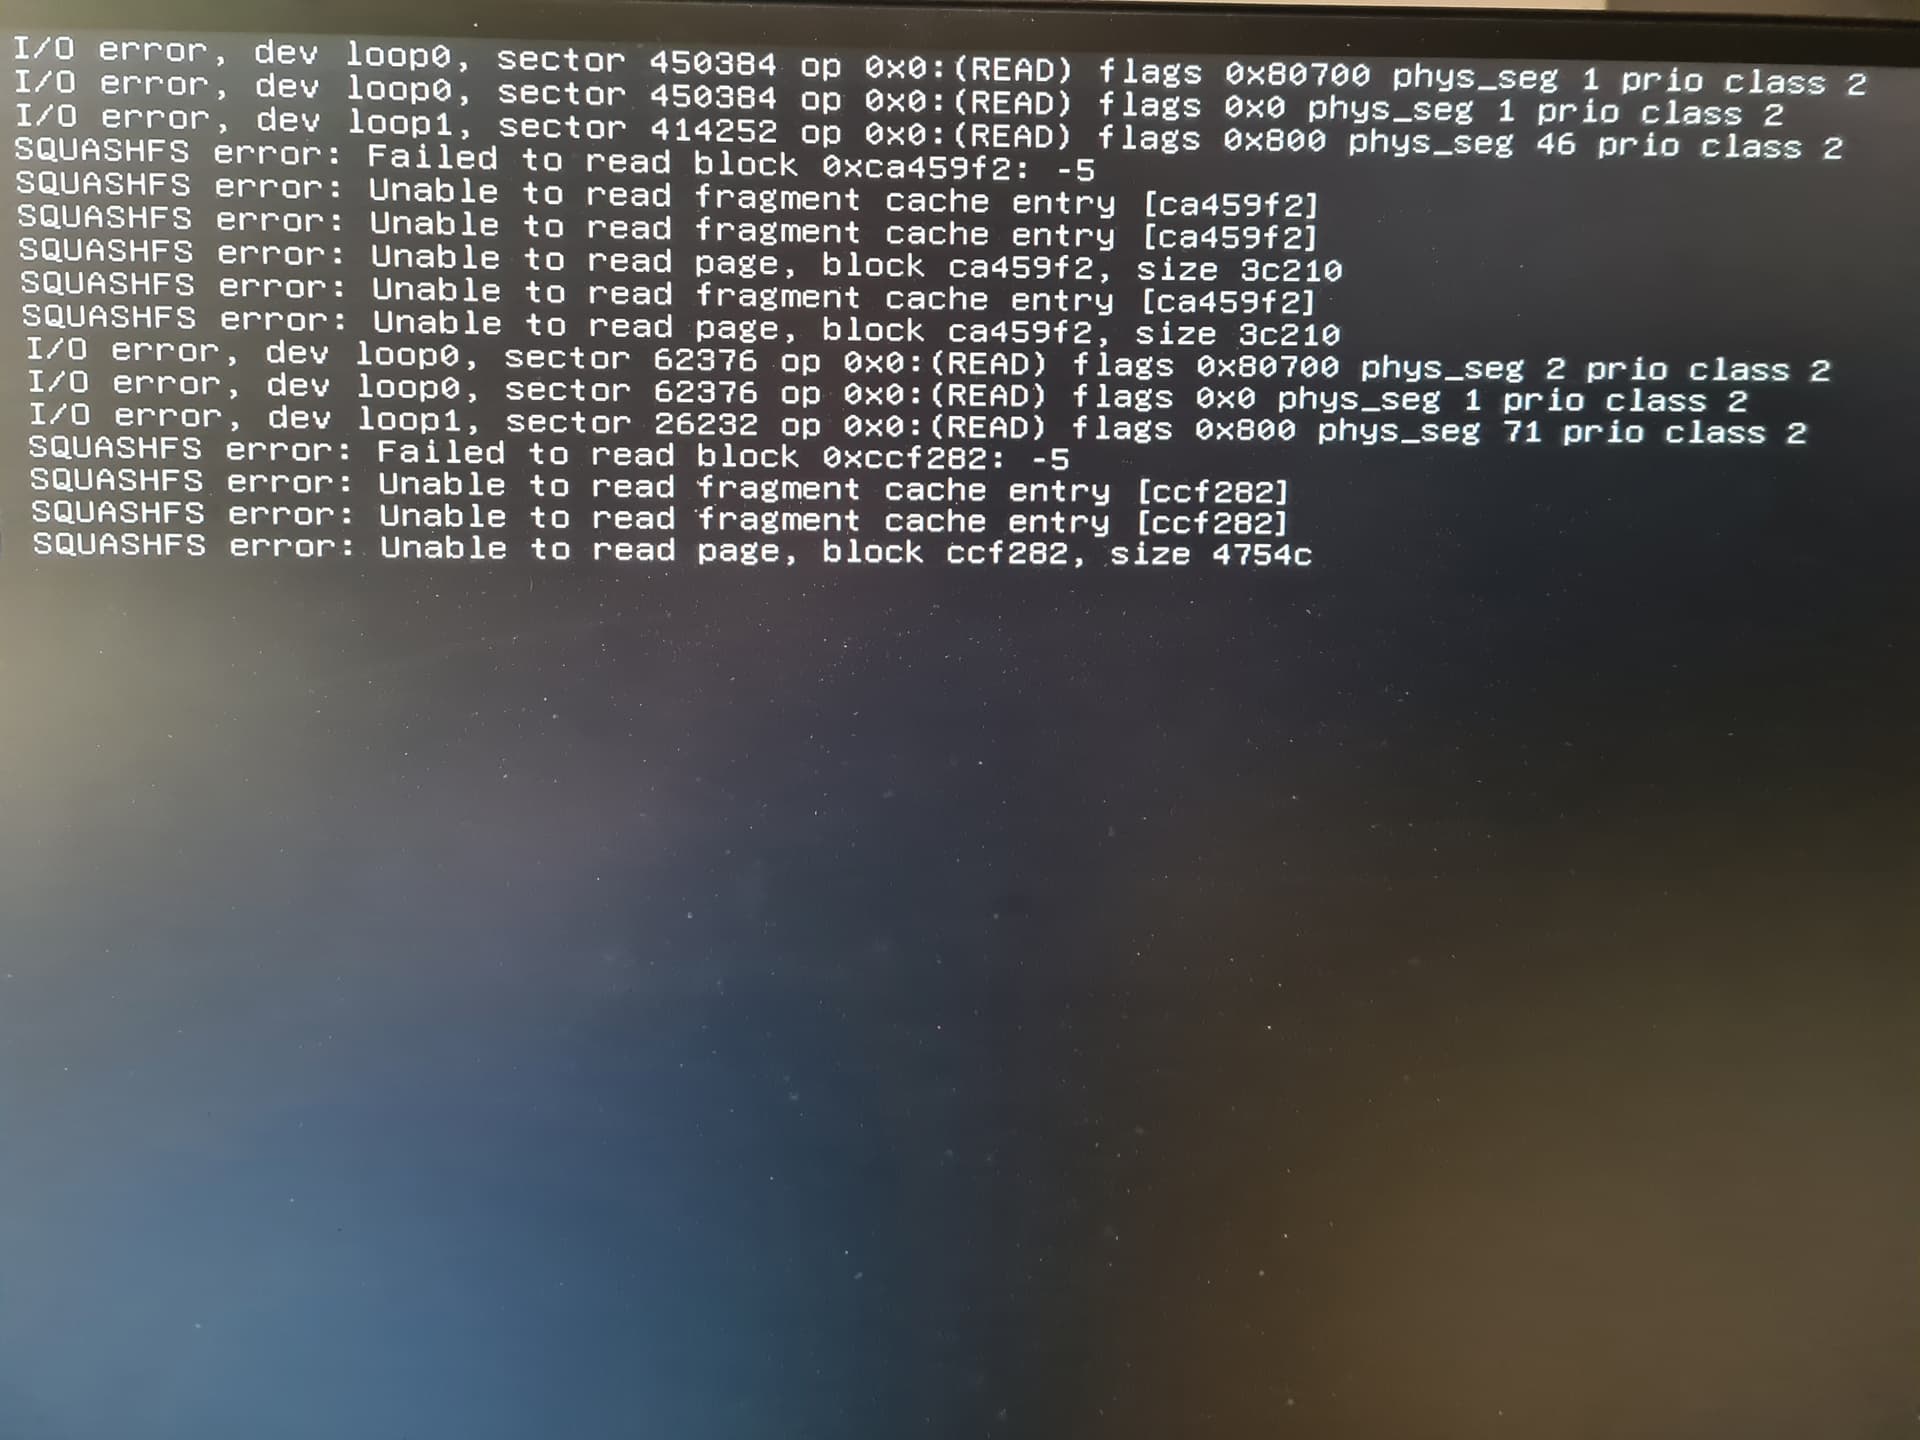
But when I try to shut down or reboot after I’m done in clonezilla my computer gets stuck (see pic) and I can’t even ctrl+alt+delete my way out of there, have to hard reset my computer with the reset button or hold power for 5s.
I’m not looking for a gui replacement or anything other that requires an usb stick.
Or are you saying I can just switch out the clonezilla iso file to a rescuezilla iso in my above config, update-grub and that would fix it?
I guess I’m asking how to loop and mount an iso-file in grub so I can run it as a “live-usb”…
Oh, just checked your link, thought it went to the same I linked to in my post, yeah, I checked that one too and have tried back and forth with different methods.
I tried maaaaaany different linux (loop)/live/vmlinuz lines, and the one in my initial post is the only one I got to even load.
Something has changed since I tried this a few weeks ago.
Things that did not work before is now working. Not sure if I should be happy or cry. xD
The reason the /opt version doesn’t work for me might be because I use btrfs, I read that somewhere while doing further research today, but now I can’t recall where so I could use it as reference…
My hd is at the moment at /dev/sdb2 so in second entry it becomes hd1,2. (hd0 is sda)
No need to put ANY options now apparently.
I think the first entry is preferable, the uuid will never change, but I have noticed that sometimes, not often but sometimes the device order of the disks change and that will require me to change the second entry.
Thanks to @MrLavender who provided me a link, that led me to the following link, a nice reference to a few different iso files and tips on how to mount them in grub.