After a falling out with VirtualBox, I’m eager to try using QEMU/KVM for virtualization. I’ve found this Manjaro guide:
The last time it was updated was Feb 2023. A question for anyone who use QEMU/KVM, is there anything in this guide that might need to be updated which I should take into consideration before diving in?
some helpful tips: if you’re virtuliasing distros like manjaro try to use the option “propietary graphic driver” at the installation-process of the distro. this will install the red-hat-virtio-gpu-driver in most cases. this performs a way better than the ordinary settings.
if you’re virtualising ms-windows install the fedora-virtio-win drivers in this windows machine. especially if your network-drivers in windows aren’t working. this fedora-support is great stuff for virtualising windows in kvm/qemu
keep in mind to add yourself to the libvirt-group as described in your link. without you’re getting in problems that can be easy prevented with it
I concur with the others on this, the wiki appears to be up to date.
I would add two things;
First, keeping the VM’s in the default location of /var/lib/libvirt is in my opinion ideal. But beware, if you have a small root partition, you may run into space issue.
Personally, I like to give the /var it’s own partition and preferably on a separate drive, if possible.
Second, if you are using any kind of SSD, be sure fstrim.timer service is enabled, you will write much data with VM’s. sudo systemctl enable --now fstrim.timer
Enjoy, I find Virt-Manager superior to VirtualBox in almost everyway.
Change the type of SATA Disk 1 (the disk image of the creating virtual machine) to *virtio* for better performance. Change discard mode to *unmap* , and then apply the change. You should notice the device name would change from SATA Disk 1 to VirtIO Disk 1.
…and ran into the problem where the drive doesn’t appear in the list of available volumes for the Windows installation. If I don’t change the type to virtio it works fine.
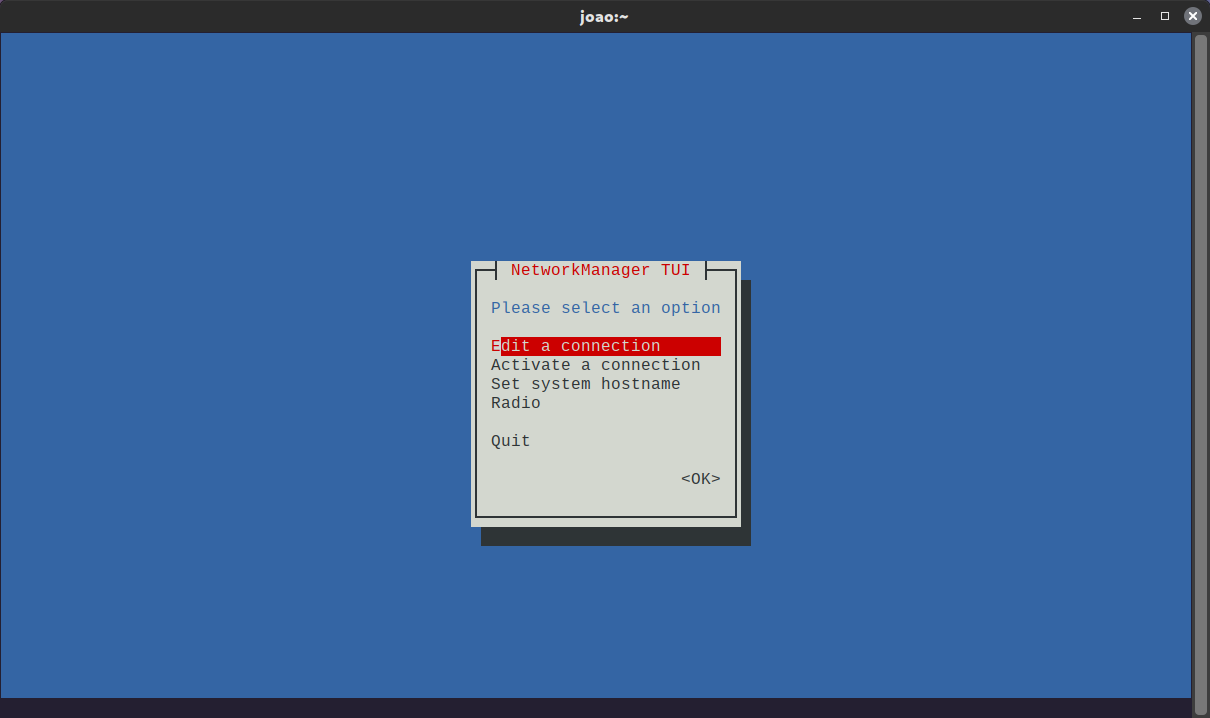
Easiest way is to use nmtui from the command line;
From the main menu, select “edit a connection”, You should be presented with your current network, Ethernet, WIFI etc.
Click <Add> to add a new connection
From the list select “Bridge”, it will take you to the edit of the connection instantly.
Name the profile and device what ever you want.
In the “Bridge Slaves”, go to and select the current network device you want to use for the bridge. For example if you are hardwired via Ethernet, select Ethernet.
Give this profile a name as well, but you can leave the default. save and exit.
Now you are back on the Bridge connection screen, make sure “Automatically connect” and “Available to all users” has an X and save.
Back to the main menu, select “Activate a Connection” and activate your new Bridge, it may take a few seconds to initiate.