In this post I want to show how to install CUDA & cuDNN as a first step for additional software, e.g. OpenCV or others. However, the following steps are for those who want to go through it step by step themselves without using an AUR.
For this installation, I have selected the current version of CUDA 11.5 (Rev. 1) and cuDNN 8.3.1, also due to the fact that it is the latest version (when this post was written). You can change the versions according to your needs.
cuDNN relies on the CUDA version and therefore it is easy to choose it.
IMPORTANT: You should have the NVIDIA driver already installed (in my case rev. 495), because I didn’t test the installation of the driver myself and it’s also not recommended to use the NVIDIA installer for this. The installer assumes an Ubuntu and is not necessarily designed for ARCH distros.
Let’s go:
1.0 Download the CUDA installer and execute it
cd ~
wget https://developer.download.nvidia.com/compute/cuda/11.5.1/local_installers/cuda_11.5.1_495.29.05_linux.run
chmod +x cuda_11.5.1_495.29.05_linux.run
./cuda_11.5.1_495.29.05_linux.run
You will get the following screen after you accepted the EULA. In this menu, you have to deselect the driver installation as we already should have it.
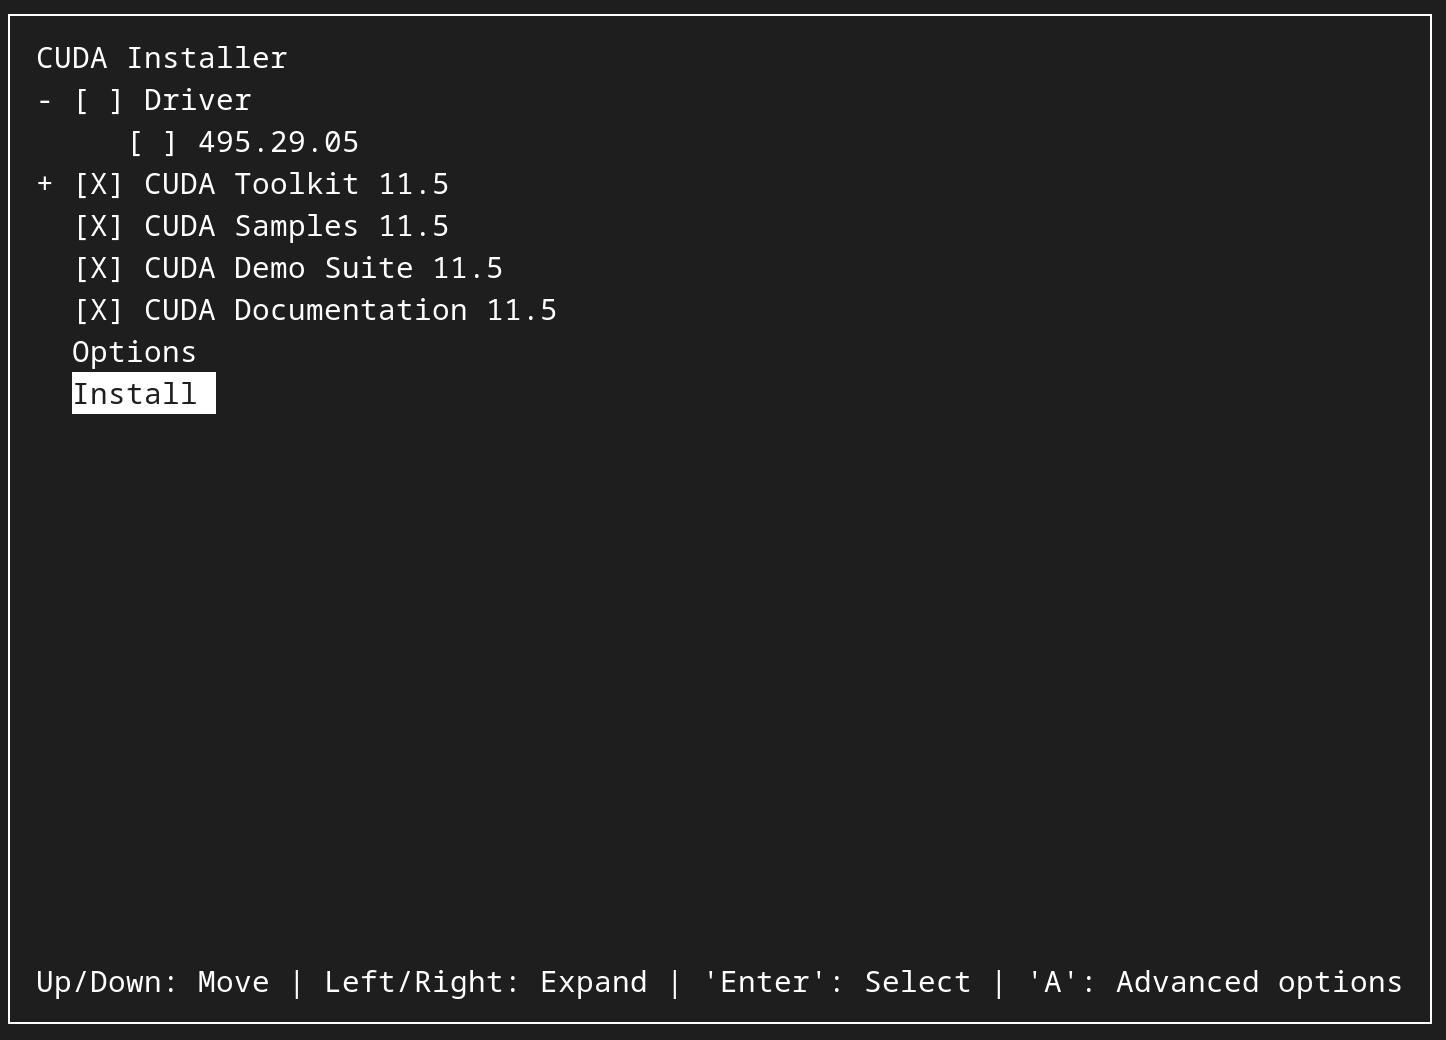
Choose Install and be patient, this will take a while to complete.
2.0 Setting the PATH
Next, add the CUDA path to .bashrc:
nano ~/.bashrc
at the end of the file:
export PATH="${PATH}:/usr/local/cuda-11.5/bin"
export LD_LIBRARY="${LD_LIBRARY}:/usr/local/cuda-11.5/lib64"
and the same for .zshrc; paste the previous lines here too:
nano ~/.zshrc
In addition, add it to ld.so.conf, therefore switch to su and not using sudo:
sudo su
echo /usr/local/cuda-11.5/lib64 >> /etc/ld.so.conf
ldconfig
exit
3.0 Compiling some CUDA tools and picking out the CUDA COMPUTE CAPABILITY
Now, let’s do some compilations to ensure everything is ok and we get the CUDA COMPUTE CAPABILITY of the installed NVIDIA card. This is important, because you need it later e.g. in case you’d like to compile OpenCV or other software.
You can start compiling the examples by executing the commands below. We will then use the deviceQuery to automatically determine the CUDA compute capability:
export CUDA_EXAMPLES_PATH="NVIDIA_CUDA-11.5_Samples"
cd ~/$CUDA_EXAMPLES_PATH
make -j$(nproc)
cd ~
You will find it in the file ~/ComputeCapability.opencv after the compilation is done:
if [ -f ~/$CUDA_EXAMPLES_PATH/1_Utilities/deviceQuery/deviceQuery ];  then
   ~/$CUDA_EXAMPLES_PATH/1_Utilities/deviceQuery/deviceQuery
   ~/$CUDA_EXAMPLES_PATH/1_Utilities/deviceQuery/deviceQuery | grep "CUDA Capability Major/Minor version number:" >  ~/ComputeCapability.CUDA
   for i in ` sed s'/=/ /g' ~/ComputeCapability.CUDA | awk '{print $6}' `
       do
       export CUDA_COMPUTE_CAPABILITY=$i
       echo "CUDA_COMPUTE_CAPABILITY "$CUDA_COMPUTE_CAPABILITY
       awk -v "a=$CUDA_COMPUTE_CAPABILITY" -v "b=10" 'BEGIN {printf "%.0f\n", a*b}' >     ~/ComputeCapability.opencv
   done
fi
If you do
cat ~/ComputeCapability.opencv
you should get e.g a 2-digit number. This is the CUDA COMPUTE CAPABILITY of your NVIDIA card.
4.0 Download cuDNN
Next, we need cuDNN. Therefore, you have to register an account for free at CUDA Deep Neural Network (cuDNN) | NVIDIA Developer
Select Download and then you can go ahead.
Once you’re in, select the following package:
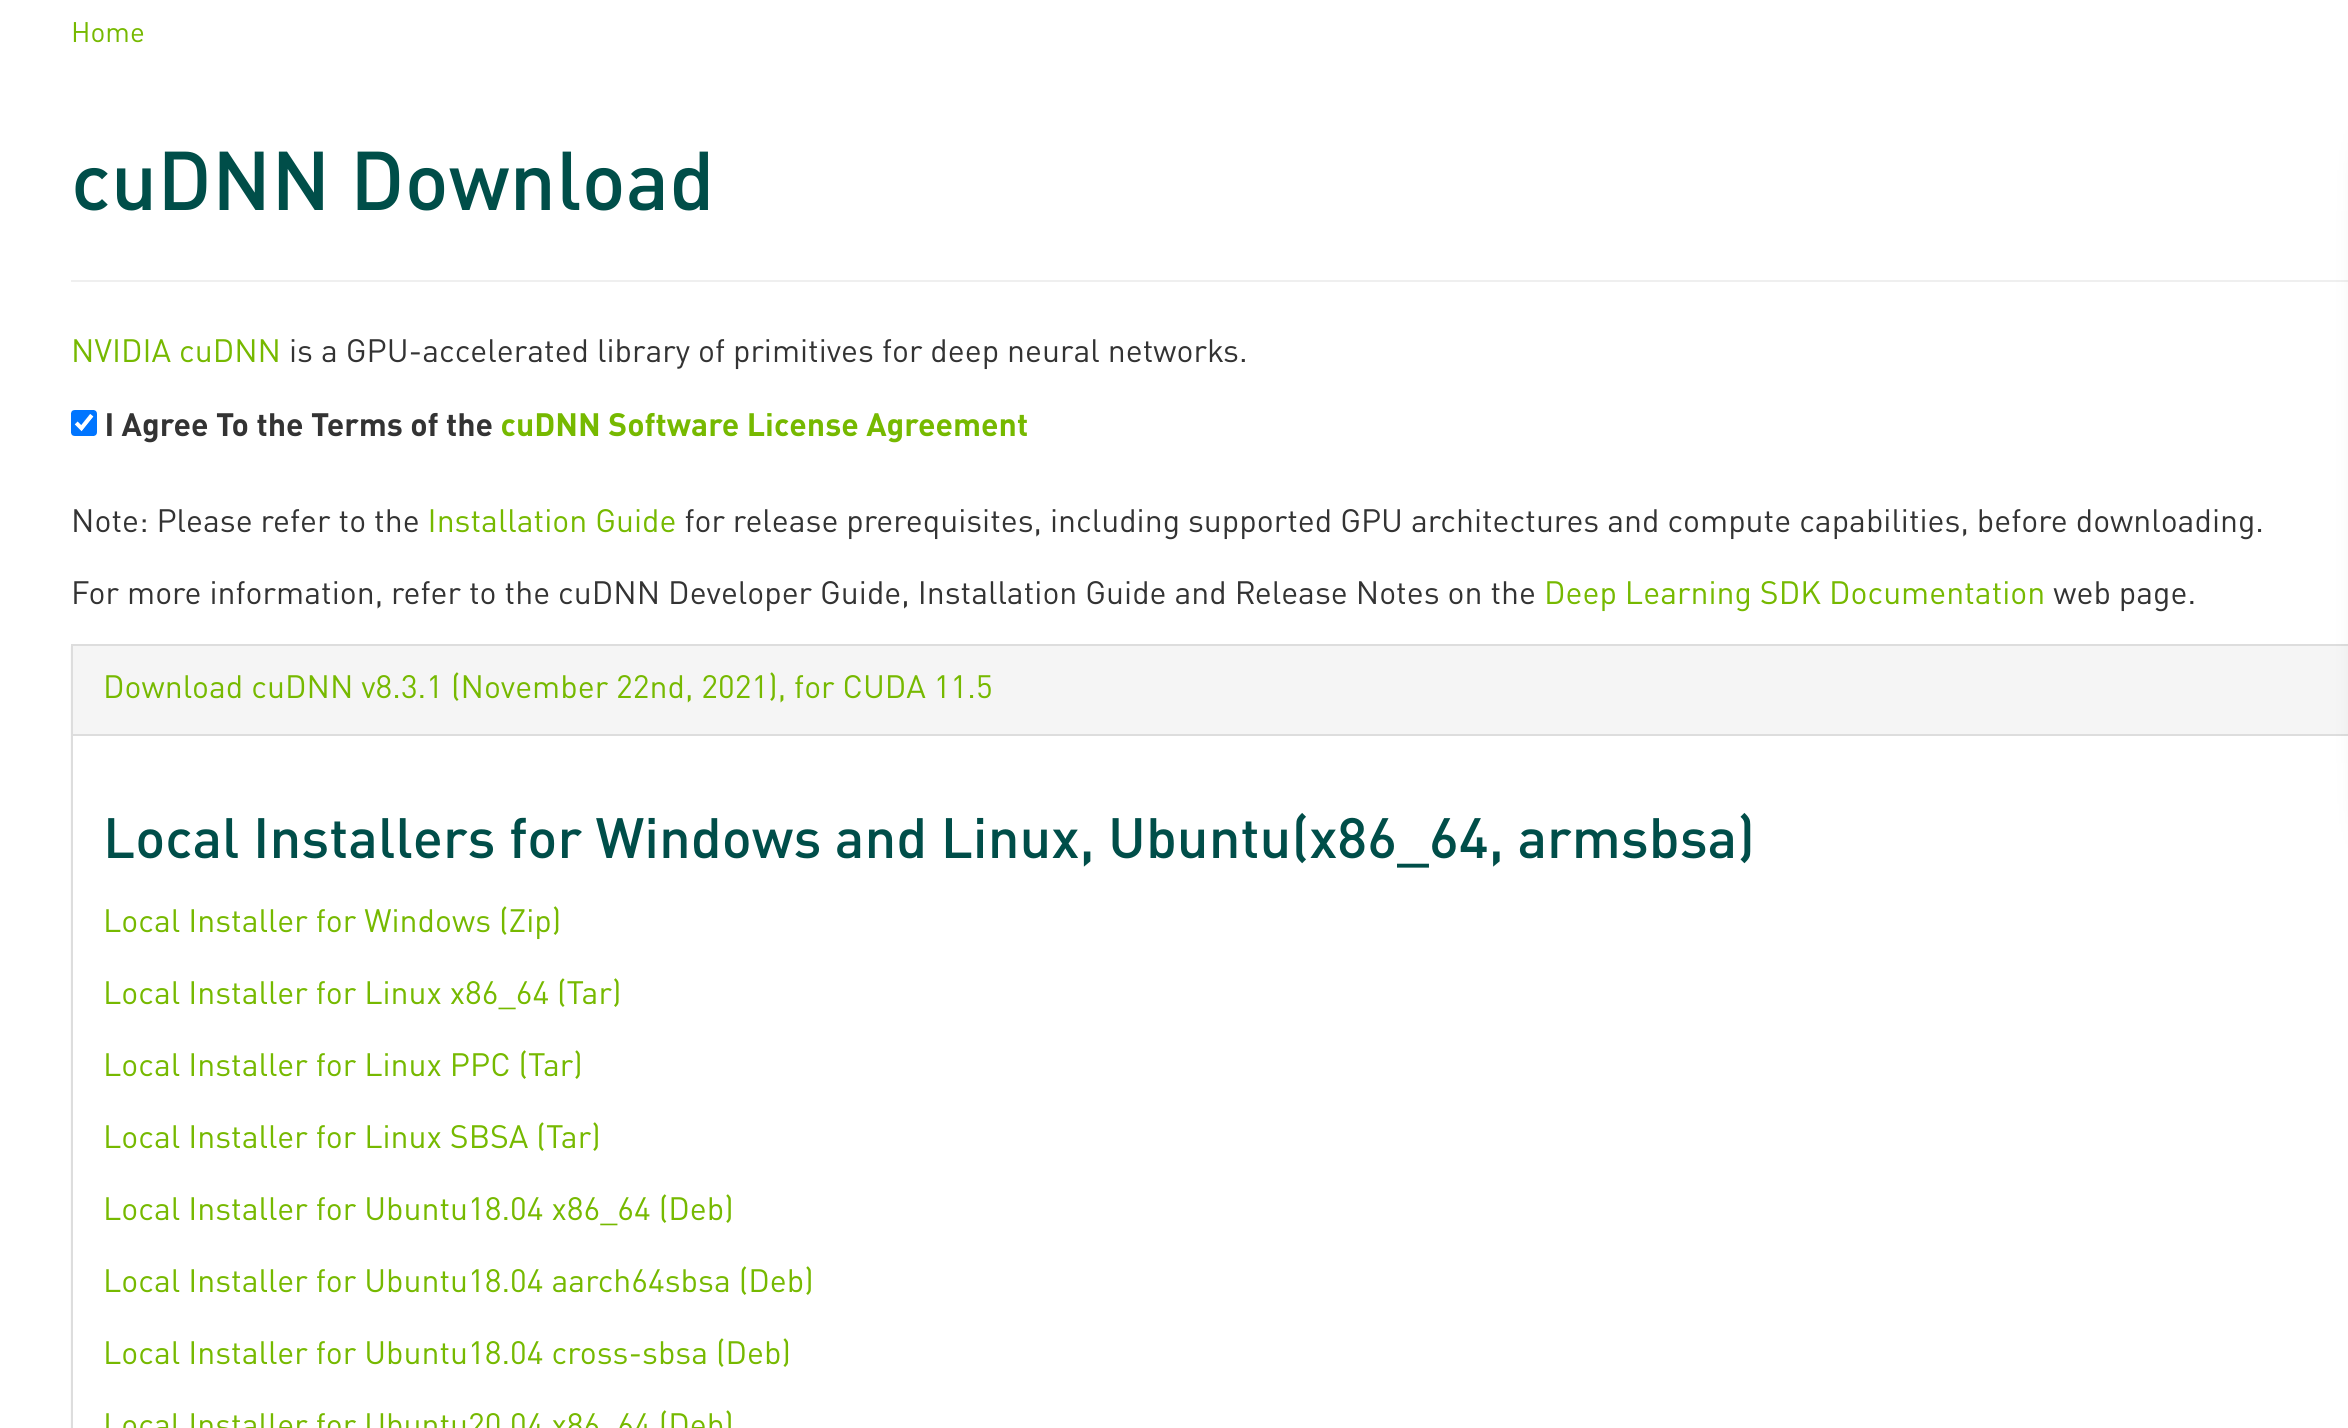
This is important, because the cuDNN version is depending on the CUDA version! Download the Local Installer for Linux x86_64 (Tar).
4.1 Installing cuDNN
After downloading, the package must be unpacked in the home directory:
chmod +x ~/Downloads/cudnn-linux-x86_64-8.3.1.22_cuda11.5-archive.tar.xz
tar -xf ~/Downloads/cudnn-linux-x86_64-8.3.1.22_cuda11.5-archive.tar.xz -C ~/
Installing it:
cd ~
sudo cp cudnn-linux-x86_64-8.3.1.22_cuda11.5-archive/include/cudnn*.h /usr/local/cuda/include
sudo cp cudnn-linux-x86_64-8.3.1.22_cuda11.5-archive/lib/libcudnn* /usr/local/cuda/lib64
sudo chmod a+r /usr/local/cuda/include/cudnn*.h /usr/local/cuda/lib64/libcudnn*
cd /usr/local/cuda/lib64

if [ -f libcudnn.so ];   then sudo rm libcudnn.so;   fi
if [ -f libcudnn.so.8 ]; then sudo rm libcudnn.so.8; fi

sudo ln libcudnn.so.8.3.1 libcudnn.so.8
sudo ln libcudnn.so.8 libcudnn.so

cd  /usr/local/cuda-11.5/targets/x86_64-linux/lib
if [ -f libcudnn_adv_infer.so ];   then sudo rm libcudnn_adv_infer.so;   fi
if [ -f libcudnn_ops_train.so ];   then sudo rm libcudnn_ops_train.so;   fi
if [ -f libcudnn_cnn_train.so ];   then sudo rm libcudnn_cnn_train.so;   fi
if [ -f libcudnn_cnn_infer.so ];   then sudo rm libcudnn_cnn_infer.so;   fi
if [ -f libcudnn_adv_train.so ];   then sudo rm libcudnn_adv_train.so;   fi
if [ -f libcudnn_ops_infer.so ];   then sudo rm libcudnn_ops_infer.so;   fi
if [ -f libcudnn_adv_infer.so.8 ]; then sudo rm libcudnn_adv_infer.so.8; fi
if [ -f libcudnn_ops_train.so.8 ]; then sudo rm libcudnn_ops_train.so.8; fi
if [ -f libcudnn_cnn_train.so.8 ]; then sudo rm libcudnn_cnn_train.so.8; fi
if [ -f libcudnn_cnn_infer.so.8 ]; then sudo rm libcudnn_cnn_infer.so.8; fi
if [ -f libcudnn_adv_train.so.8 ]; then sudo rm libcudnn_adv_train.so.8; fi
if [ -f libcudnn_ops_infer.so.8 ]; then sudo rm libcudnn_ops_infer.so.8; fi

sudo ln libcudnn_adv_infer.so.8.3.1 libcudnn_adv_infer.so.8
sudo ln libcudnn_ops_train.so.8.3.1 libcudnn_ops_train.so.8
sudo ln libcudnn_cnn_train.so.8.3.1 libcudnn_cnn_train.so.8
sudo ln libcudnn_cnn_infer.so.8.3.1 libcudnn_cnn_infer.so.8
sudo ln libcudnn_adv_train.so.8.3.1 libcudnn_adv_train.so.8
sudo ln libcudnn_ops_infer.so.8.3.1 libcudnn_ops_infer.so.8
sudo ln libcudnn_adv_infer.so.8 libcudnn_adv_infer.so
sudo ln libcudnn_ops_train.so.8 libcudnn_ops_train.so
sudo ln libcudnn_cnn_train.so.8 libcudnn_cnn_train.so
sudo ln libcudnn_cnn_infer.so.8 libcudnn_cnn_infer.so
sudo ln libcudnn_adv_train.so.8 libcudnn_adv_train.so
sudo ln libcudnn_ops_infer.so.8 libcudnn_ops_infer.so
Finalizing:
sudo ldconfig
5.0 Check
After performing the above steps, CUDA as well as cuDNN should now be available. Trying to compile OpenCV shows the successful installation:
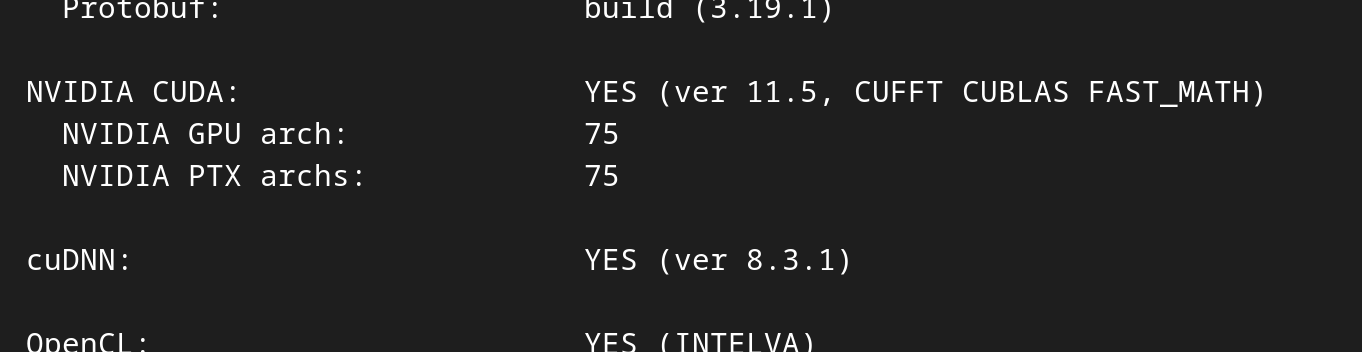
 , so to speak…